Blue Iris Quick Start Guides 2024, Video Management Software Use up to 64 cameras (webcams, network IP cams, analog cards, or your Windows PC desktop). Capture JPEG snapshots or movies in standard MP4, AVI, advanced DVR, or Windows Media file formats.
editor’s note: The application supports many brands and models. The main models are included in the article. We explained our guide through the Amcrest system.
Blue Iris User Manual
To download a full user manual for Blue Iris 5, click on the link provided below.
How To Upgrade Blue Iris Demo Software With An Amcrest License Without Losing Settings
If you are currently using a demo version of the Amcrest Blue Iris software upgrading your account will not reset your settings. All settings will be retained on the software after the upgrade is complete. For more information on how to upgrade your demo version of Blue Iris to paid version, please follow the steps provided below.
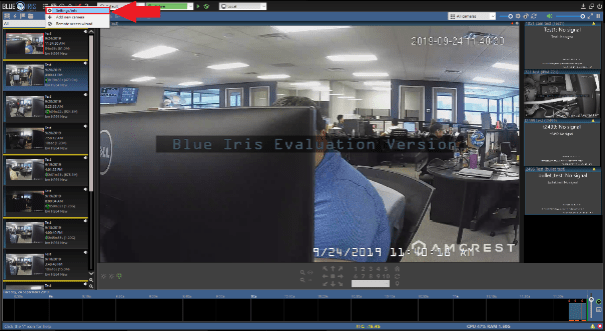
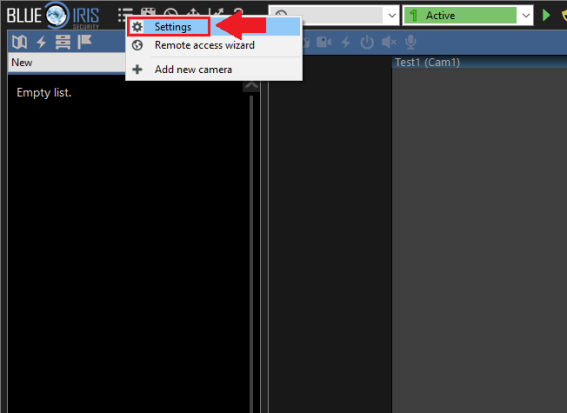
Step 1: Open your Blue Iris software and click on the Settings option (  ) in the upper left corner of the interface and click on Settings/info.
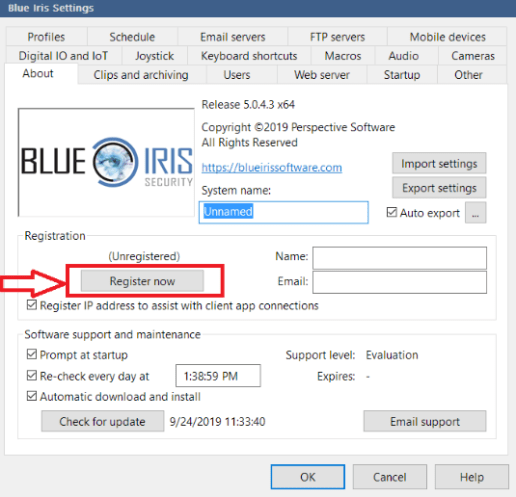
Step 2: In the About tab, click on the Register now option.
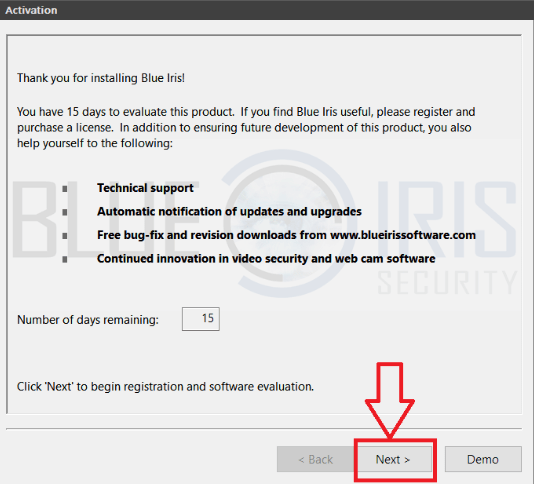
Step 3: In the Activation screen, click Next
Step 4: Enter the Amcrest license number or key you have purchased into the activation box. Click Next to continue.
Step 5: Click Finish once the code has been activated.
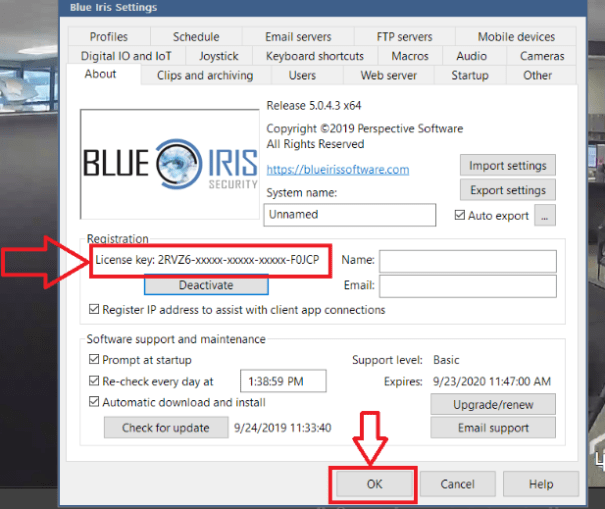
Step 5: The new license key has now been applied to your Blue Iris software. The information can be viewed in the License Key section of the menu. Click OK to continue.
The “Evaluation Copy” overlay will be removed from the live view screen and your previous settings will be accessible throughout the software.
Blue Iris 5 Compatibility
To install the Blue Iris 5 software onto your computer, go to the Blue Iris website and download the installation file .
Minimum Requirements
Recommendations When Using Many and/or HD Cameras
Compatible with the Following Brands:
Amcrest, 4XEM, ACTT, Airlink101, AIRLive, Allnet, Apexis, Arecont, Astak, AVTech, Avlosys, Axis, Bosch, Canon, Cisco, Coolcam, Dericam, Di4-Lan, DLink, EasyN, Edimax, Evocam, Foscam, Gadspot, Ganz, Gandstream, Hawking, HIKVision, HooToo, Intellinet, JVC, Linksys, Logitech, Lorex, Microseven, Mobotix, Panasonic, Pelco, Planet, Sanyo, Sharx, Siemens, Sony, Stardot, Swann, Toshiba, Tenvis, TO-LINK, Trendnet, Vivotel, Wansview, Y-Cam, Zavio, Zonet and many more.
For more information on how to install the Blue Iris 5 software, click here.
Blue Iris UI3 update Issue
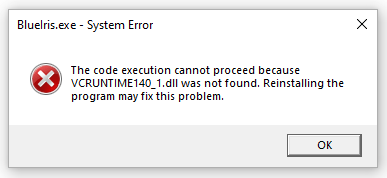
If you are attempting to update to a new version of the Blue Iris software and receive an error such as:
this is not a result of a bug or issue with the software itself but is a result of an update made to Visual Studio C++ compiler which is the software used to build Blue Iris. To resolve the issue, a simple reinstall of the software will fix the problem, however, if you wish to resolve the issue without reinstalling the software, please refer to the information below.
A resolution will be based on the which version of Windows you are running. For instance, if you are operating on a 64-bit version of Windows you will need to search and run the VCREDIST_X64.exe to resolve the issue. If you have a 32 bit system you will run the VCREDIST_X32.exe.
If this file is not found on your computer you may run it from the following URL blueirissoftware.com/VCREDIST_X64.exe (or VCREDIST_X32.exe for 32 bit).
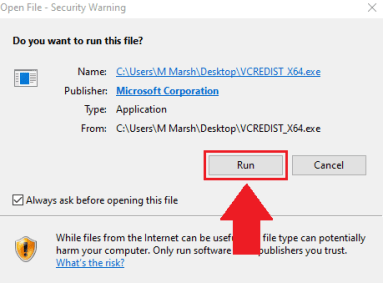
Step 1: Load the VCREDIST .exe file and click Run
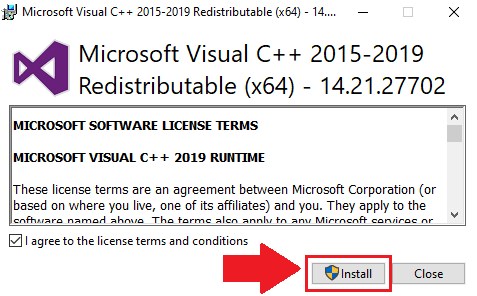
Step 2: Click on Install.
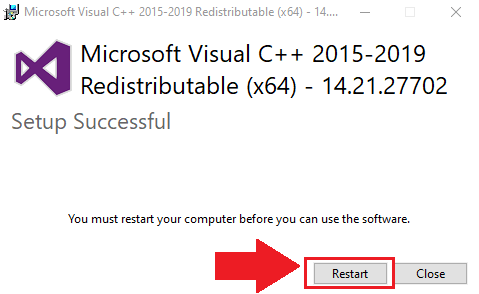
Step 3: A restart of your computer will be required to complete the install. Click on Restart to restart your computer.
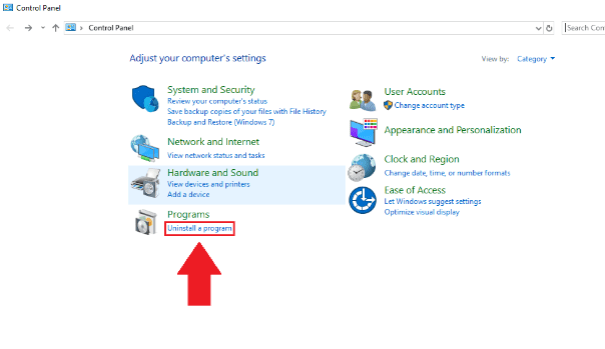
After your computer has finished restarting please load the Blue Iris software and run the update as normal. If this does not fix the issue a full re-install of the software may be required. To re-install the Blue Iris software on your computer, access the Control Panel and click on “Uninstall a program”.
Locate the Blue Iris Software from the Programs and Features list and click Uninstall. Select “Yes” to remove Blue Iris from your computer. For more information on how to install Blue Iris on your computer click
Note: It is recommended to not delete any registry entries or license activations during this process.
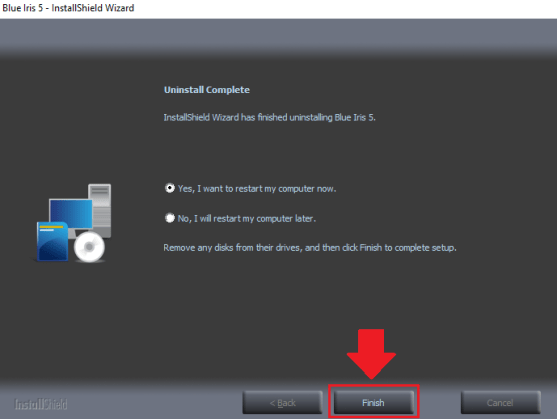
Click Finish, to restart your computer and complete the uninstall.
For more information on how to install the Blue Iris software on your computer, click here.
Blue Iris Not Automatically Starting up After a Crash?
If your Blue Iris software crashes or becomes unresponsive and the software does not restart automatically with its last settings displayed then the software may need to be ran as a Windows service. By default, Blue Iris 5 is not set to run as a Windows service so therefore would have to be implemented manually. For more information on how to set Blue Iris as a Windows service, refer to the information provided below.
Step 1: Open Blue Iris 5 and click on the settings menu located in the upper left corner of the screen.
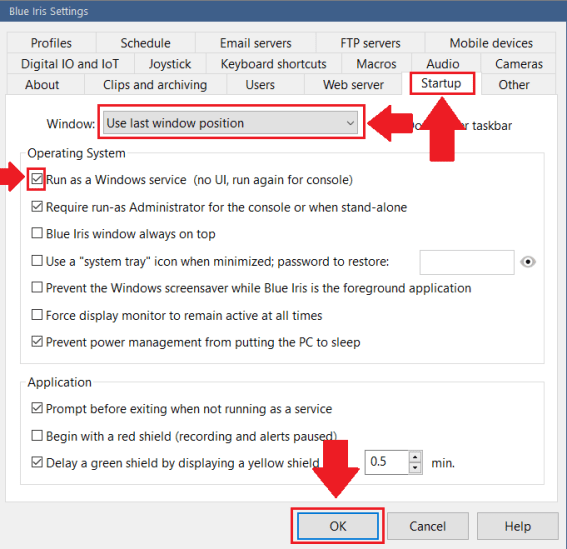
Step 2: In the Settings menu, click on the Startup tab.
Inside the Startup tab, make sure the “Use last window position” option is selected in the Window field then click on the “Run as a Windows service (no UI, run again for console)” checkbox. This will enable your software to run as a Windows service. Click OK to continue.
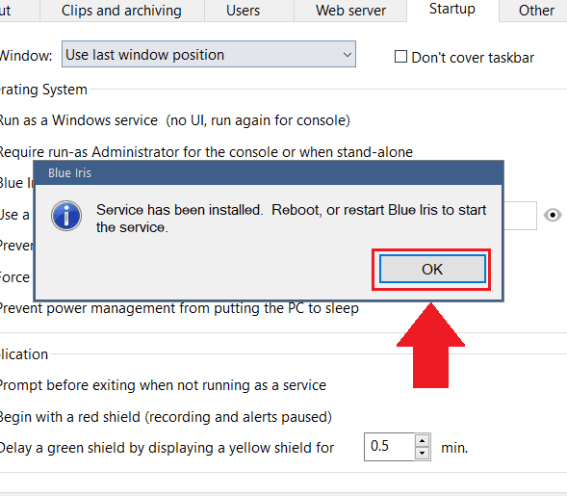
Step 3: The service will install automatically. Click OK to reboot or restart the Blue Iris software.
The software is now running as a Windows service which allows the software to reboot with last settings in tact after a crash or service interruption.
How to Add a Camera Into Blue Iris
The camera and the computer you are using must be on the same network during setup. Please make sure you are running the most current version of Blue Iris during setup. The latest version of Blue Iris can be downloaded here.
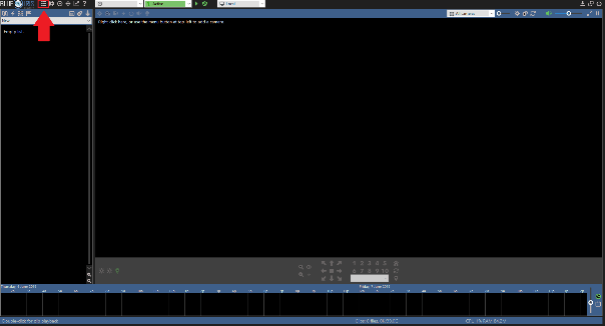
There are 2 ways to add a camera into Blue Iris. You can right click on the main menu, or click on the settings menu (  )in the top-left corner of the interface.
Adding a Camera
To begin, right-click on the main interface or click on the settings menu ( ) to access the “New camera” menu.
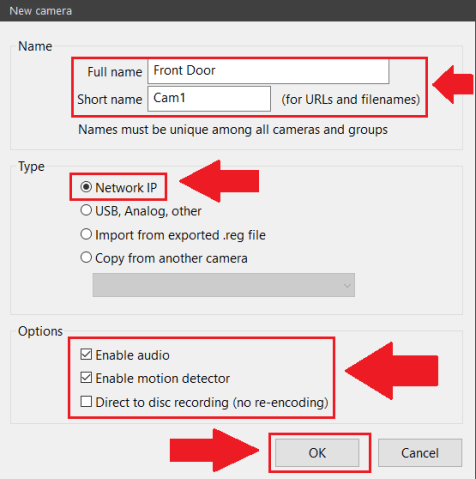
In the new camera menu, give your camera a name, a short name (for URLs and filenames), choose a type, which in this case will be a Network IP, and enable any options such as, enabling audio, motion detection, etc. Click OK to continue.
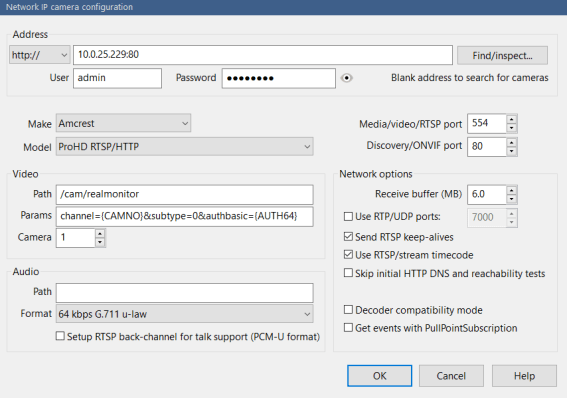
This will open two windows. The top window will be Network IP Camera Configuration. Enter the address of your camera (IP Domain or DDNS as well as RTSP address) and click on the Find/Inspect… button on the right to confirm. Enter the username and password, select the make as Amcrest, select the model of your device (ProHD and HDseries cameras as “ProHD 1080p RTSP/HTTP”), and specify the RTSP and ONVIF ports.
Note: If you choose the other option profile, “ProHD/IP2/3/4/4M Mainstream RTSP” features such as PTZ or other related features may not be accessible. Please use ProHD 1080P RTSP/HTTP in the Model field.
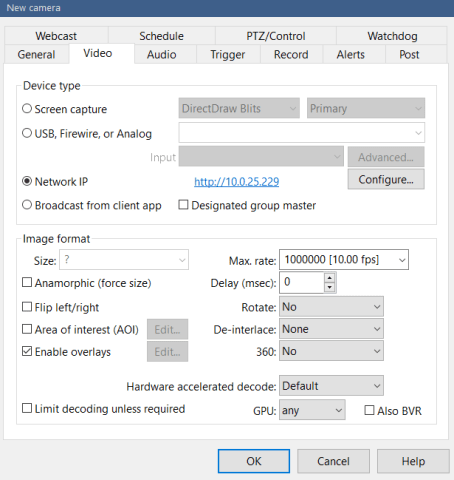
After filling in the information required, click OK. The second window will appear titled New Camera. Here you can make many adjustments to the way you want Blue Iris to configure your camera.
The page is defaulted to the Video tab. The options available for adjustment are Image Format and Frame Rate, PTZ Controls, Recording through Blue Iris, Alerts through Blue Iris, and other features. Once you have finished adjusting any necessary settings, click on OK to add the camera. The live view screen of your camera will show in the interface.
How to Renew a Key in Blue Iris 5
Any expired keys in the Blue Iris 5 software will cause the software not to work with any connected cameras and may cause them to be inaccessible. Keys in the Blue Iris software provide up to one year of service from the initial start date of your license and will need to be renewed before they expire.
Note: Please ensure you are using the most up to date version of Blue Iris. To download the most up to date version of Blue Iris, click here.
For more information on how to renew your Blue Iris key, please refer to the steps provided below.
Step 1: Click on the settings menu (  ) located in the top-left corner of the interface and select “Settings”.
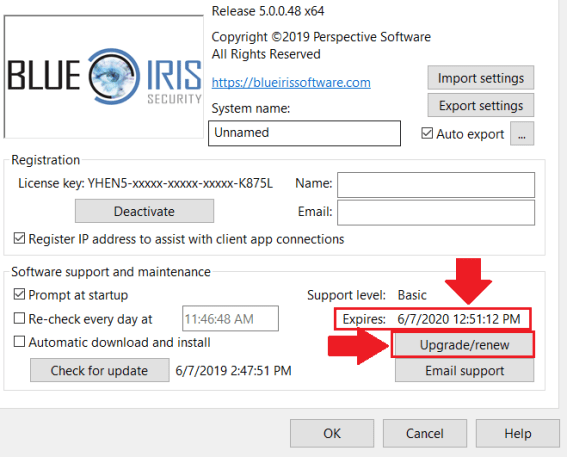
Step 2: In the bottom left corner of the Blue Iris Settings menu, click on the Upgrade/renew button to renew the key for your license.
Note: The new expiration date will be displayed in the menu and will be good for one year of the initial start date.
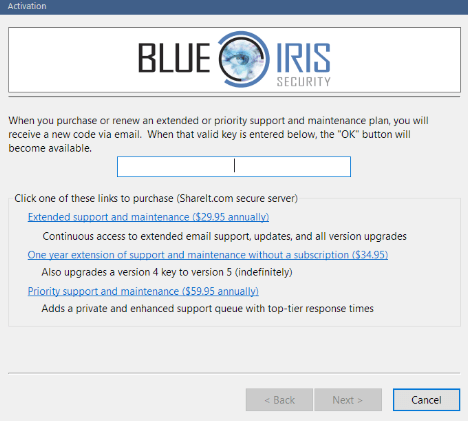
When you have purchased or renewed your account you will receive a new code in your email. Once the new key provided is entered into the Activation menu, press the “OK” button.
How To Install Blue Iris 5
To install the Blue Iris 5 software onto your computer, go to the Blue Iris website and download the installation file .
Minimum Requirements
Recommendations When Using Many and/or HD Cameras
Compatible with the Following Brands:
Amcrest, 4XEM, ACTT, Airlink101, AIRLive, Allnet, Apexis, Arecont, Astak, AVTech, Avlosys, Axis, Bosch, Canon, Cisco, Coolcam, Dericam, Di4-Lan, DLink, EasyN, Edimax, Evocam, Foscam, Gadspot, Ganz, Gandstream, Hawking, HIKVision, HooToo, Intellinet, JVC, Linksys, Logitech, Lorex, Microseven, Mobotix, Panasonic, Pelco, Planet, Sanyo, Sharx, Siemens, Sony, Stardot, Swann, Toshiba, Tenvis, TO-LINK, Trendnet, Vivotel, Wansview, Y-Cam, Zavio, Zonet and many more.
Follow the on screen instructions to install the software. You can use the demo version or purchase a license. There is are options for a fill license (up to 64 cameras) for $69.95 or a Lite license for a single camera for $34.95.
Note: Any Blue Iris keys that have expired support have to be renewed or upgraded for it to work in Blue Iris version 5. Additionally, if you are upgrading from version 4, please allow access and remove version 4 from your system. Please say NO to deleting any of your settings. Settings are automatically backed up to C:\Program Files\Blue Iris5\backup_upgrade_50.reg. Click OK to continue.
Now that you have your software installed, it’s time to start adding your cameras. Ensure that you have already installed your cameras and they are working correctly in a web browser. For more information on how to access your camera in a web browser (web UI), click here
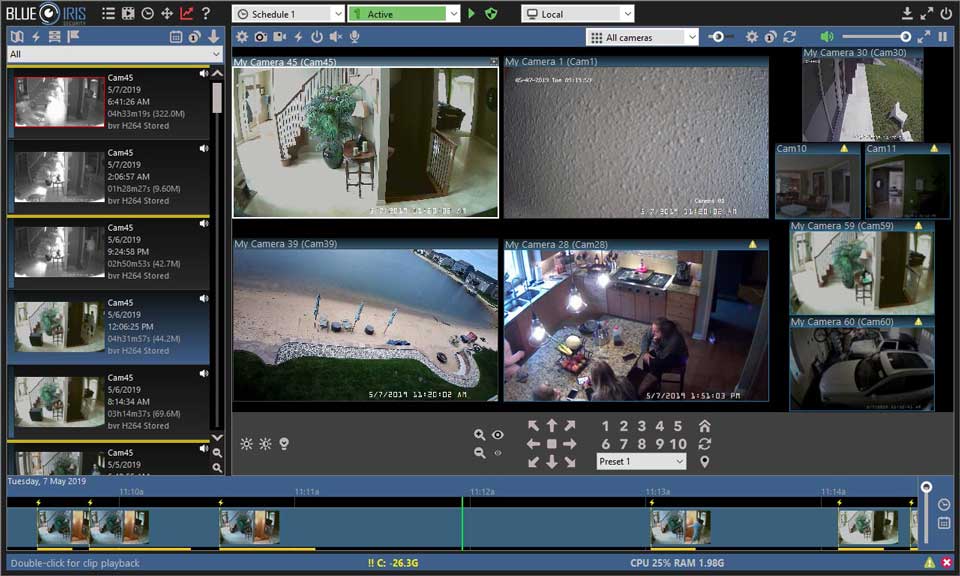
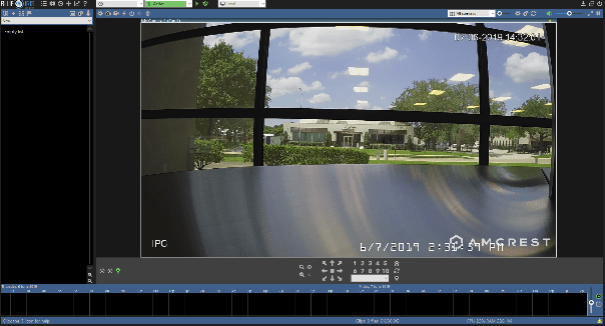
If you have any PTZ cameras, go ahead and set the presets, if any, now through the web interface before adding them to Blue Iris. The Blue Iris interface is shown below:
For more information about adding a camera into the Blue Iris software click here
How to Enable Two Way Audio Using Blue Iris
If your camera supports two-way audio and you are using it in Blue Iris, two-way audio can be configured directly in the software. Please make sure a compatible microphone is set up and configured on your computer before enabling it in Blue Iris. For more information on how to enable two-way audio using Blue Iris please refer to the information provided below.
Step 1: Log into Blue Iris and access the device.
Step 2: Click on the Blue Iris software settings icon.
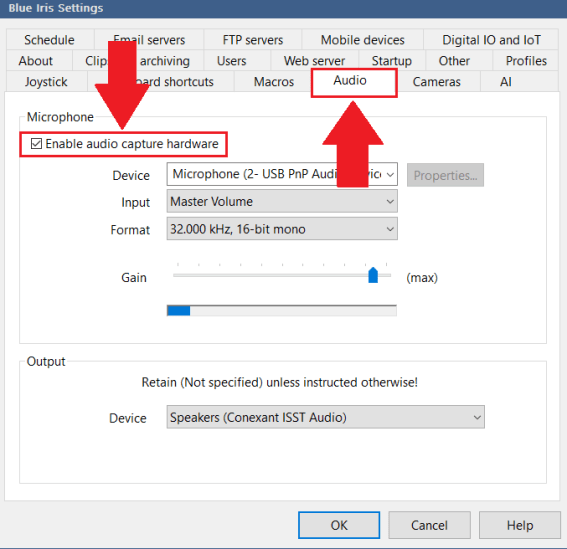
Step 3: Click on the Audio tab and enable the Enable audio capture hardware option.
Note: Make sure the proper microphone is selected in the Device dropdown menu. Use the Gain slider to adjust and test the microphone audio.
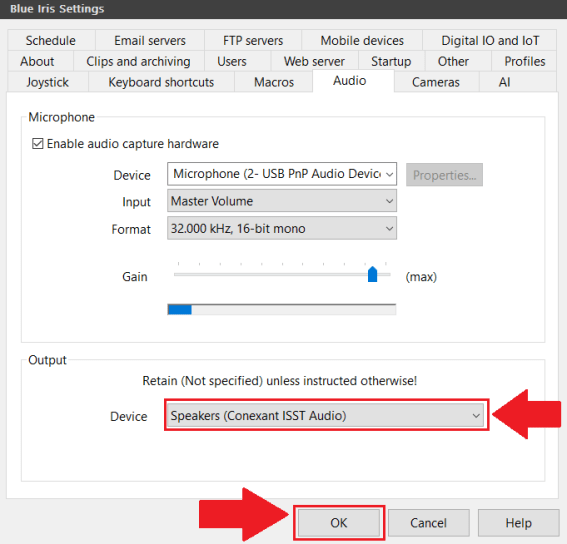
Step 4: Select the proper output device for your computer in the Output (Device) dropdown menu and click OK.
Step 5: On the main interface click the speaker option to hear the audio from the device. Then click and hold the microphone icon and speak into the microphone.
.
