TDSEE is a super easy-to-use application for smart monitoring. It integrates various features, such as
video monitoring, smart tracking,
alarm notification, two-way audio, video playback, and so on. Together with the managed smart
devices , it can be widely used in homes, enterprises, shops, machine rooms, and warehouses, meeting users’ demand for remote video monitoring.
If you already have the TDSEE App, please Login.


If you have NOT got one, scan the following QR code, or search for TDSEE in Google Play or App Store, download and install it onto your smartphone/tablet
.
.
.
.
Or
.
.
TDSEE
Login

.
.
Ensure that your smart device used for setup, such as a smartphone, can access the internet.
If you already have a registered account Step 1 Open the TDSEE App.
Step 2 Enter the registered mobile phone number or Email address and password, and tap Login .
.


—-End
If you DO NOT have a registered account Step 1 Open the TDSEE App. Tap Register.
Step 2 Choose the region where you are. Then enter your email address, and tap Get Verification Code .
Step 3 Enter the Verification Code.

.
.
If you do not receive activation code:
–Please check your spam box.
–Check if you enter the correct email address.
–Enter another email address.
.
Step 4 Set the login password, and tap OK .


—-End
Add the camera to TDSEE App

.
.
Before adding the camera, please ensure that the router is connected to the internet successfully and the filter function is disabled.
.
.
Method 1: Add a camera through QR code
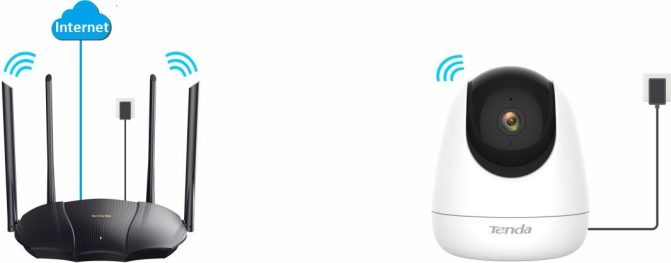
Step 1 Power on the camera.
The LED indicator lights solid red after the camera is powered on. When the LED indicator blinks blue quickly, the camera is waiting to connect to a 2.4 GHz Wi-Fi network.
Assume that the Wi-Fi name and Wi-Fi password of the router are:
− Wi-Fi name: Tenda_123456
− Wi-Fi password: UmXmL9UK
Step 2 Add the camera to TDSEE App.
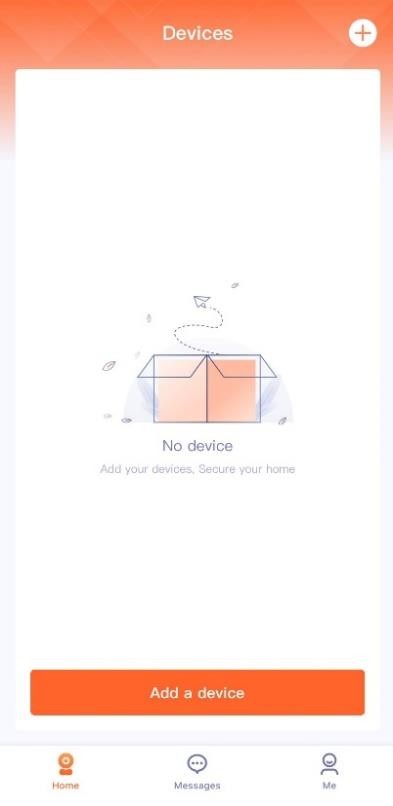
1Open the TDSEE App. Enter the home page, tap Add a device or  in the upper right corner of the home page.
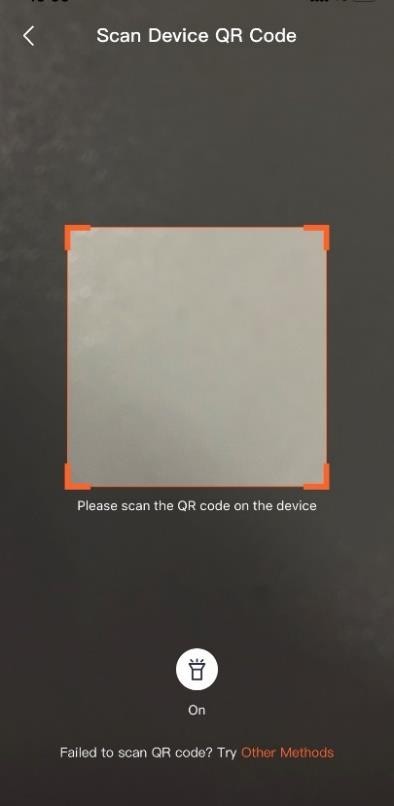
2Scan the QR code on the bottom of the camera.

.
.
 If a prompt pop up asking for access to the camera of your smartphone, please allow it.


.
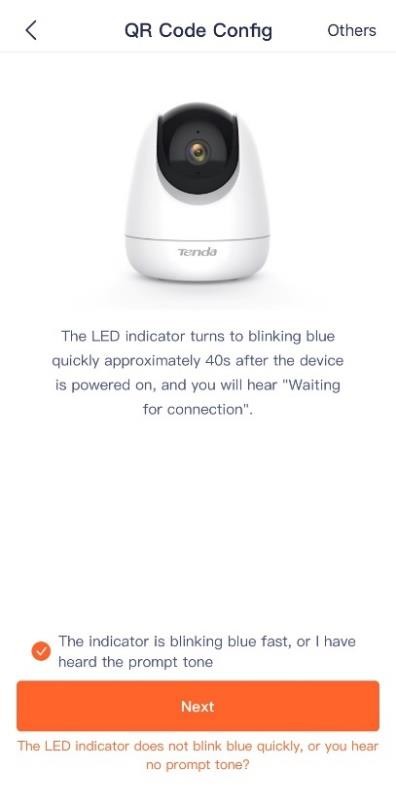
3Confirm and tick The indicator is blinking blue fast, or I have heard the prompt tone, and tap Next .
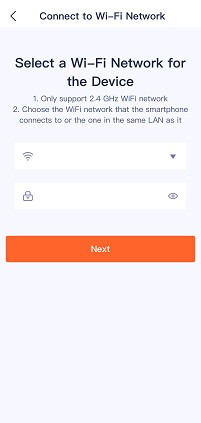
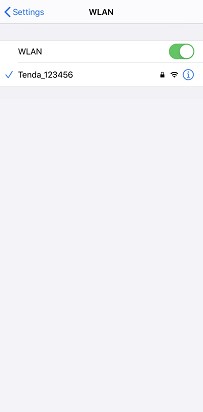
4Tap  to go to Settings > WLAN of your smartphone. Then connect to the 2.4 GHz Wi-Fi network of the router, which is Tenda_123456 in this example.
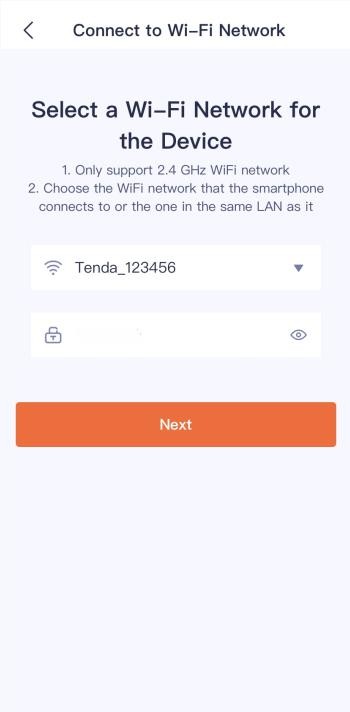
5Return to the TDSEE App, enter the Wi-Fi password, and tap Next .

.
.


 If a prompt pop up asking for access to the location information of your smartphone, please allow it.




.
6Align the lens of the camera with the QR code for scanning from 15 to 25 cm.

.
.
–Try moving the smartphone back and forth to adjust the distance between the screen of the smartphone and the camera, and keep each position for about two seconds.
–Ensure that the camera lens has no shade or blemishes. Remove the protective film (if any) and try again.
–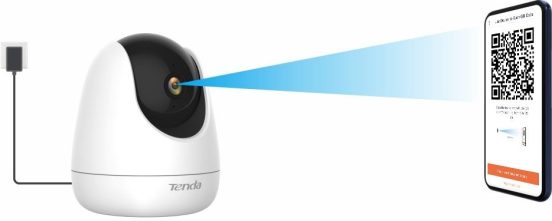 Ensure that the smartphone screen is clear, no crack and no reflections.
.
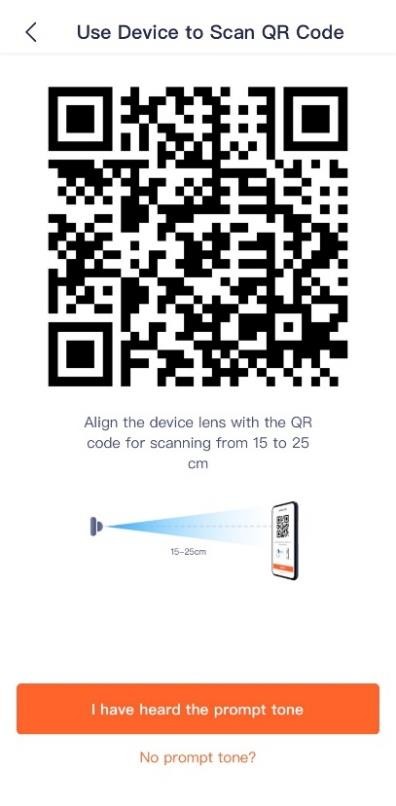
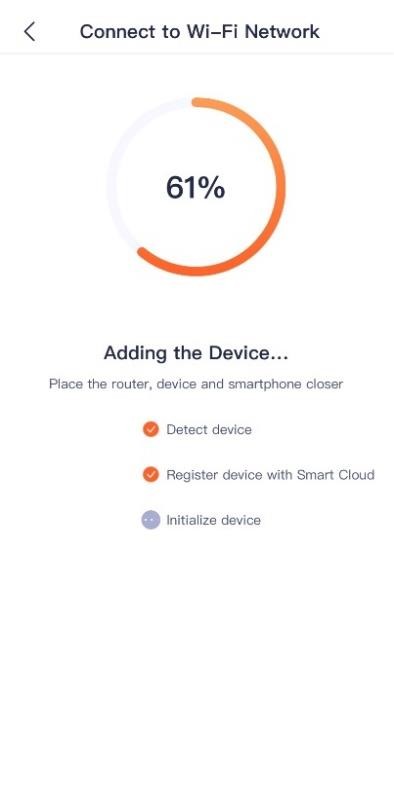
7When you hear a prompt tone Connecting Wi-Fi. Please wait, tap I have heard the prompt tone , then the TDSEE App is adding the device…
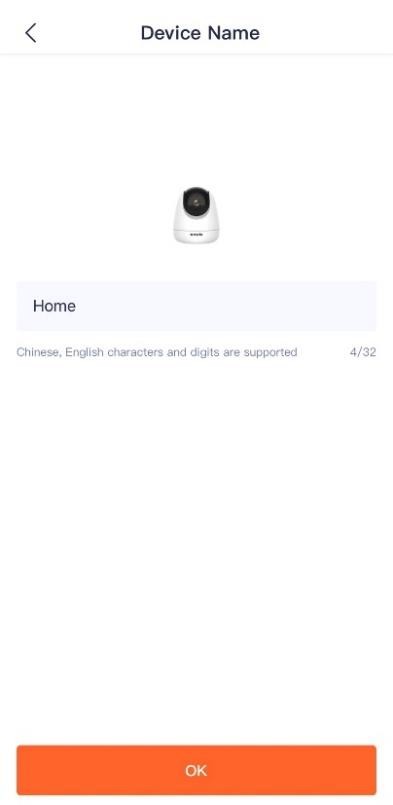
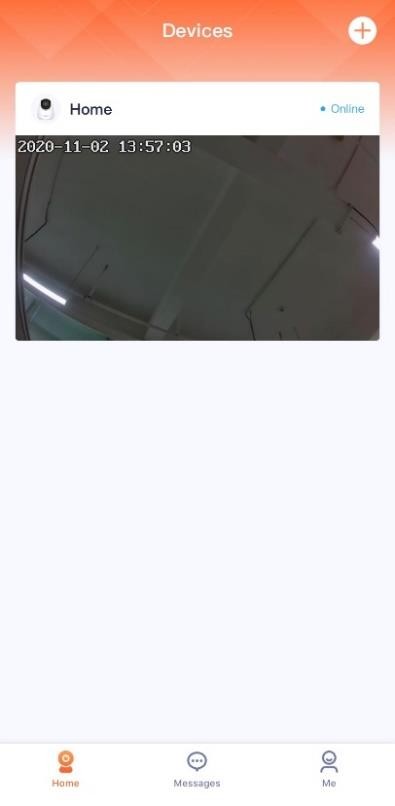
8Wait a moment, and the camera is added successfully. You can name your camera, which is Home in this example. Tap OK .





—-End
Method 2: Add a camera through hotspot
Step 1 Power on the camera.
The LED indicator lights solid red after the camera is powered on. When the LED indicator blinks blue quickly, the camera is waiting to connect to a 2.4 GHz Wi-Fi network.
Assume that the Wi-Fi name and Wi-Fi password of the router are:
− Wi-Fi name: Tenda_123456
− Wi-Fi password: UmXmL9UK
.
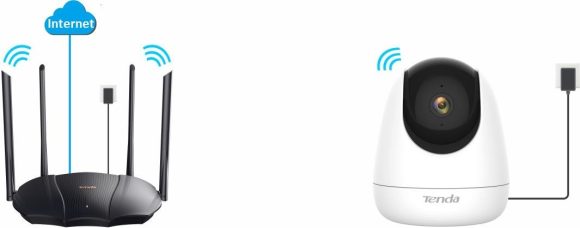 Power on the camera
Step 2 Add the camera to TDSEE App.
1Open the TDSEE App. Enter the home page, tap Add a device or  in the upper right corner of the home page.
2Scan the QR code on the bottom of the camera.

.
.
If a prompt pop up asking for access to the camera of your smartphone, please allow it.
.
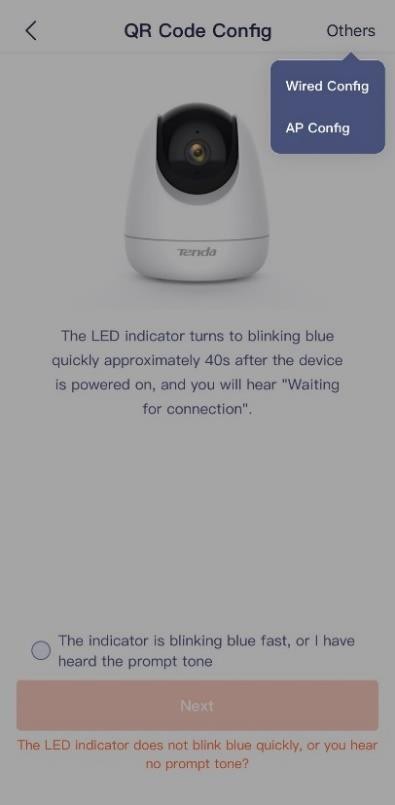
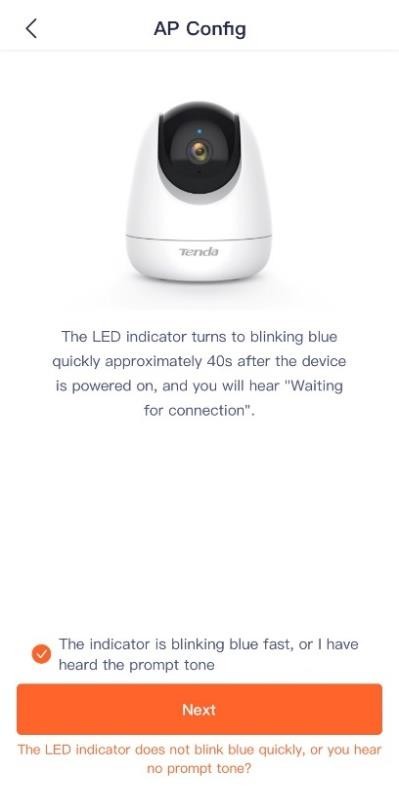
3Tap Others in the upper right corner, then select AP Config. Confirm and tick The indicator is blinking blue fast, or I have heard the prompt tone, and tap
Next .





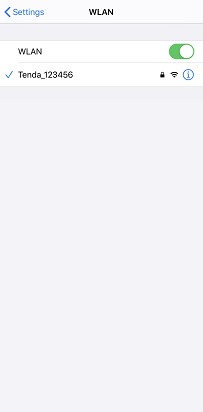
4Tap  to go to Settings > WLAN of your smartphone. Then connect to the 2.4 GHz Wi-Fi network of the router, which is Tenda_123456 in this example.
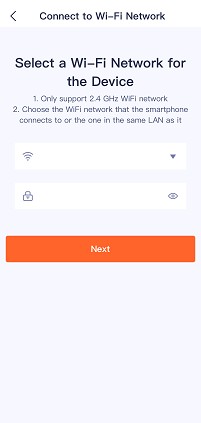
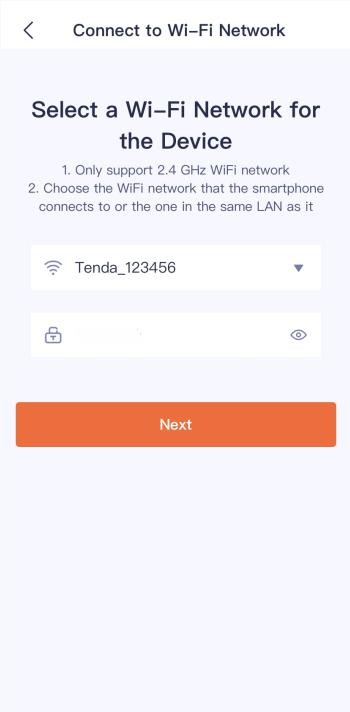
5Return to the TDSEE App, then enter the Wi-Fi password, and tap Next .

.
.
If a prompt pop up asking for access to the location information of your smartphone, please allow it.
.





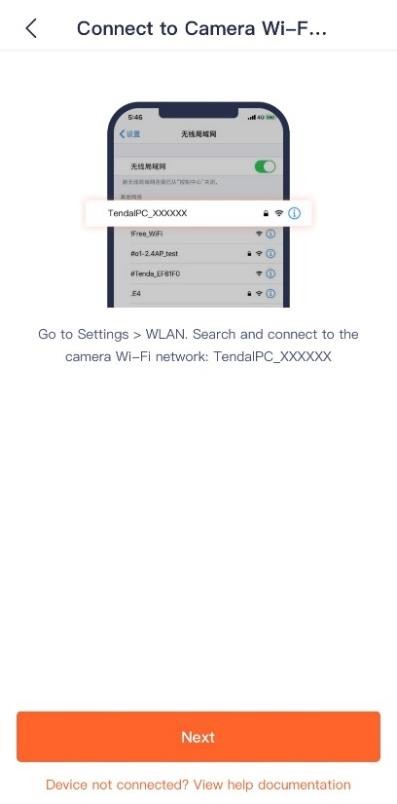
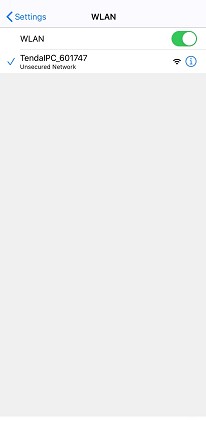
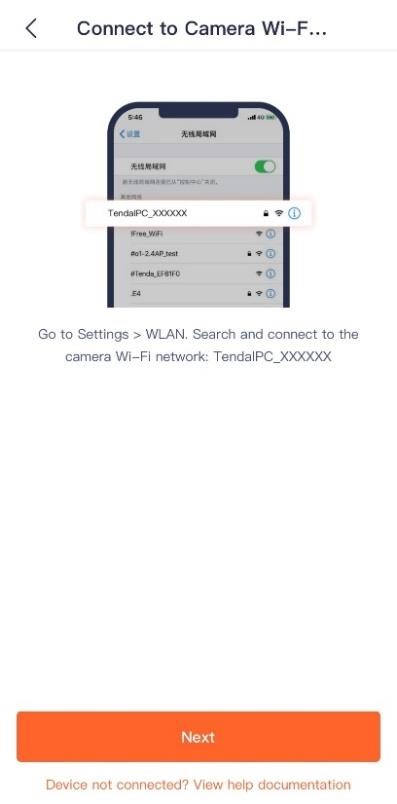
7Connect to the default SSID (Wi-Fi name) of the camera.

.
.
The SSID is TendaIPC_XXXXXX, XXXXXX indicates the last six characters of its UUID which can be found on the bottom of the device.
.
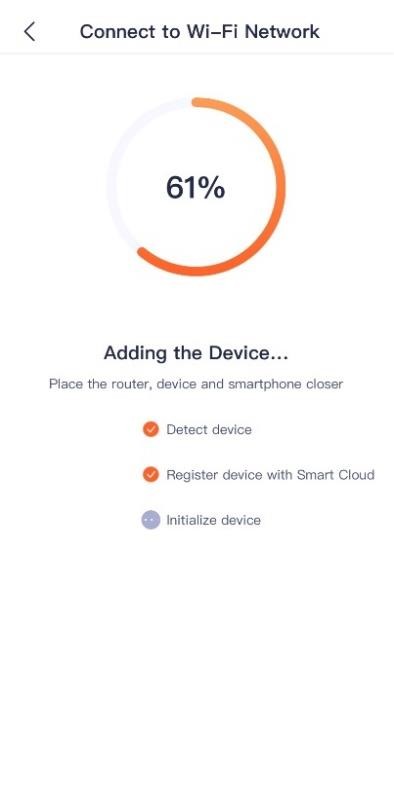
8Return to TDSEE App, then tap Next . The TDSEE App is adding the device….




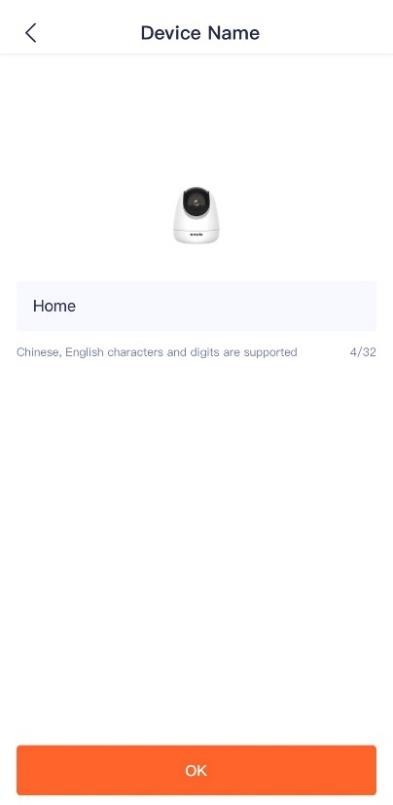
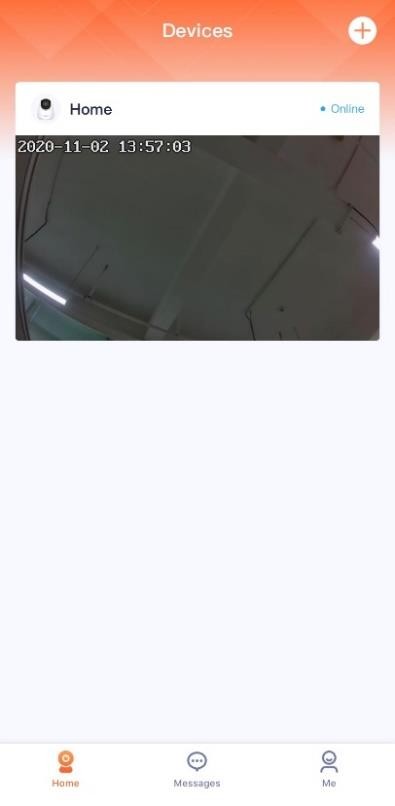
9Wait a moment, the camera is added successfully. You can name your camera, which is Home in this example, and tap OK .



—-End
Method 3: Add a camera in a wired manner
Assume that the Wi-Fi name and Wi-Fi password of the router are:
− Wi-Fi name: Tenda_123456
− Wi-Fi password: UmXmL9UK
Step 1 Connect to the camera.
1Power on the camera. The LED indicator lights solid red after the camera is powered on. When the LED indicator blinks blue quickly, the camera is waiting to connect to a 2.4 GHz Wi-Fi network.
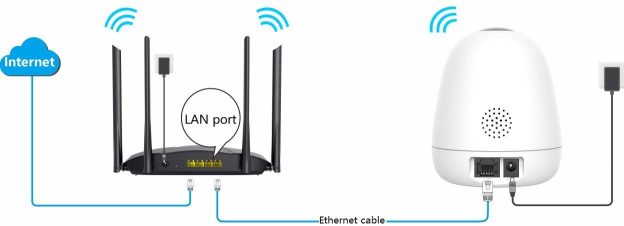
2Connect the LAN port of the camera to a LAN port of the router using an Ethernet cable.
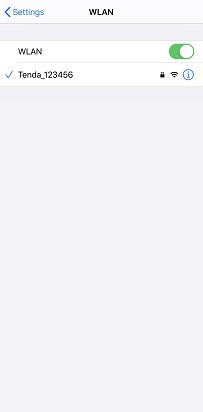
Step 2 Connect the smartphone to the Wi-Fi network of the router. Which is Tenda_123456 in this example.
.

Step 3 Add the camera to TDSEE App.
1Open the TDSEE App. Enter the home page, tap Add a device or  in the upper right corner of the home page.
2Scan the QR code on the bottom of the camera.

.
.
If a prompt pop up asking for access to the camera of your smartphone, please allow it.
TDSEE App User Guide
Read Next : ICSEE App User Guide


![]()


![]()
![]()
![]()
![]()
![]()


![]()

![]()
![]() If a prompt pop up asking for access to the camera of your smartphone, please allow it.
If a prompt pop up asking for access to the camera of your smartphone, please allow it.


![]()
![]()
![]()
![]() If a prompt pop up asking for access to the location information of your smartphone, please allow it.
If a prompt pop up asking for access to the location information of your smartphone, please allow it.


![]()
 Ensure that the smartphone screen is clear, no crack and no reflections.
![]()
![]()
![]()


 Power on the camera
![]()
![]()
![]()
![]()


![]()
![]()
![]()
![]()


![]()
![]()
![]()


![]()


![]()
