Lorex Cloud App Full Guide 2024, A professional app for professional security camera systems. Lorex Cloud keeps you connected no matter where life takes you. Whether you’re looking to record straight to the cloud, or add cloud backup to your local storage so you can access your Lorex NVR remotely, we can do both!
Videoloft removes the need for a local recorder – simplifying the installation, saving space on-site and removing the risk of your recorder being damaged or tampered with.
Alternatively, you may still want to keep your Lorex NVR/DVR and back-up your recorder to the cloud. It takes minutes to set up – all you need to do is connect the Videoloft Cloud Adapter to the same network as your recorder.
1. Lorex Cloud Setup (For Recorders)
Prerequisites:
NOTE
The first time you power up your system, you will be asked to create a new, secure password. Follow the instructions below for remote access to your security system after you have created a new secure system password through your recorder.
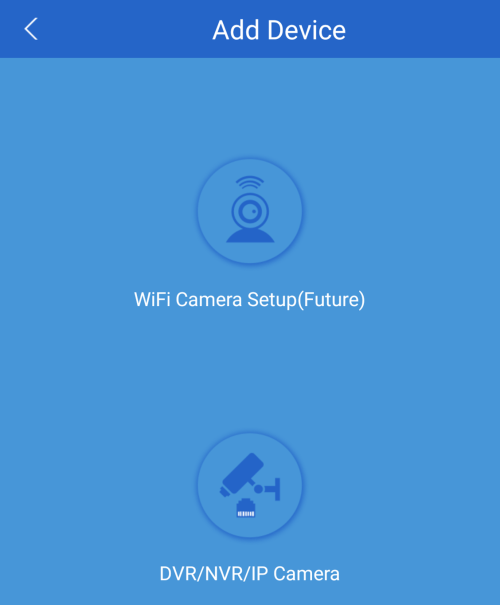
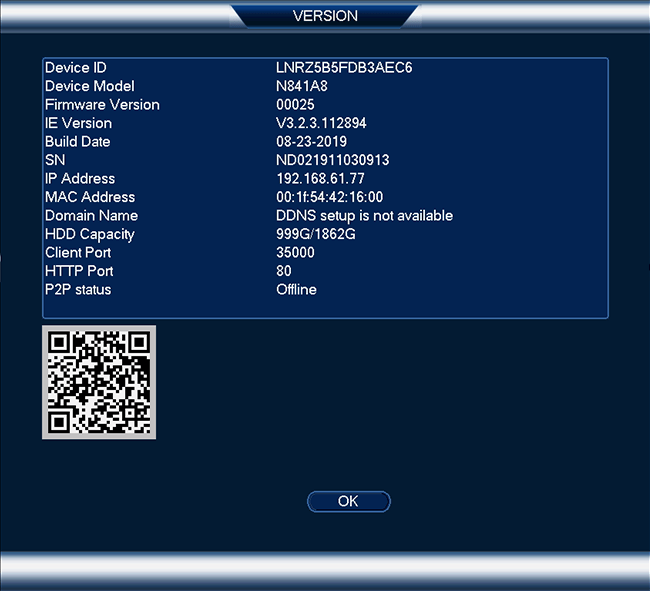
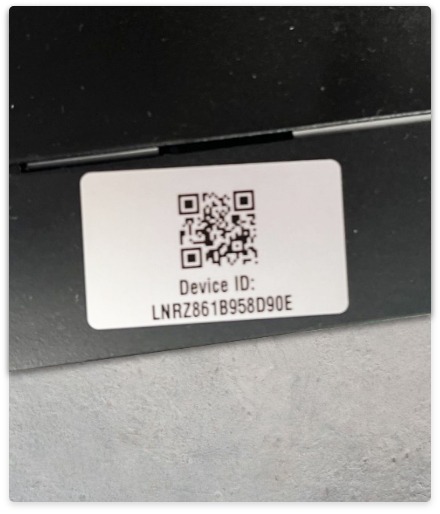
OR Under Device ID, manually enter the Device ID printed on the label.
NOTE If you are accessing your system for the first time, you must create a new password through your recorder. See your recorder’s instruction manual for more details.
How to Change or Reset Your Recorder’s Password (Compatible with Lorex Cloud App)
This article offers guidance on how to change the password of your Lorex recorder for security purposes or reset it in case you have forgotten it.
Note: These instructions apply to recorders supported by the Lorex Cloud App. Refer to the Lorex Cloud App Product Compatibility Chart for a list of compatible recorders.
Changing Your Password via Your Recorder
Retrieving your device ID
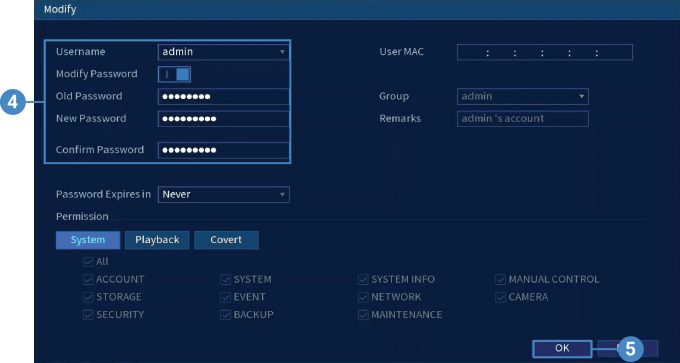
Changing or Resetting Your Recorder’s Password
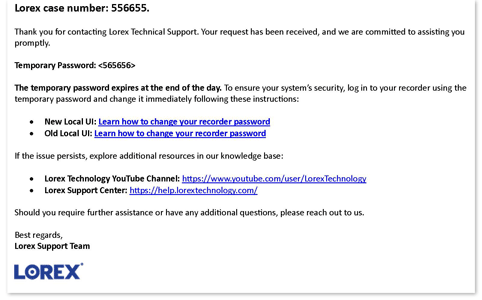
Note: When resetting your password, use the temporary password sent to you. The temporary password is valid until the end of the day. If you haven’t received a temporary password yet, refer to “How to Reset Your NVR or DVR’s Password“.
Note: Passwords for the system must be a minimum of 8 characters, and must include at least 2 of the following character types: lowercase, uppercase, numeric, and special characters.
How to Reset Your Password
There are different processes to reset your password for different types of Lorex products or accounts.
Please select the type of password reset you need:
How to Reset Your Lorex App Account Password
Please note that your Lorex Account and Lorex App account email and passwords are the same. Changing one will automatically change the other.
There are two ways to reset your Lorex App password:
Method 1: App
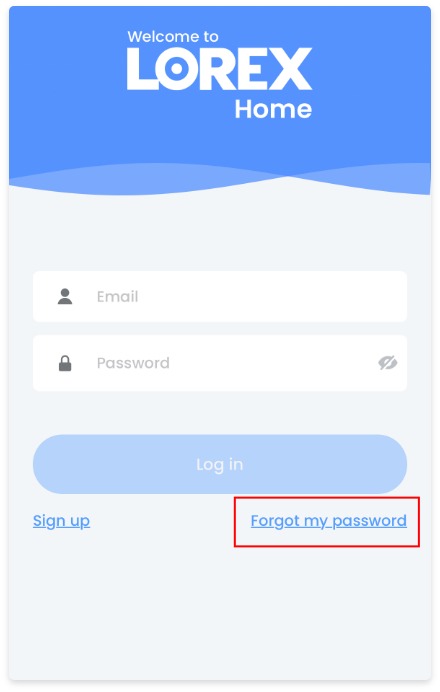
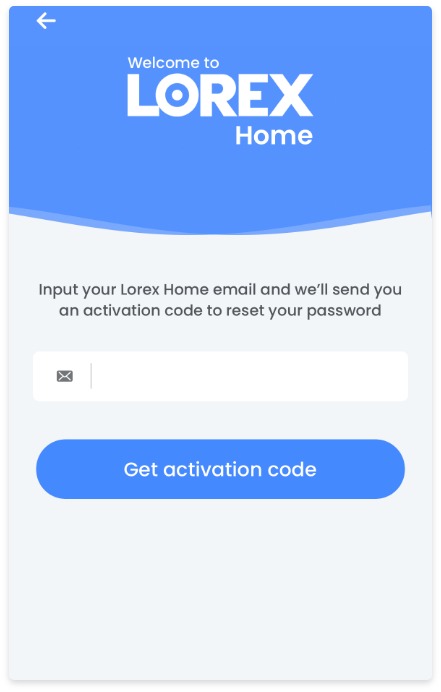
1. Click Forgot Password on the main app Login screen.
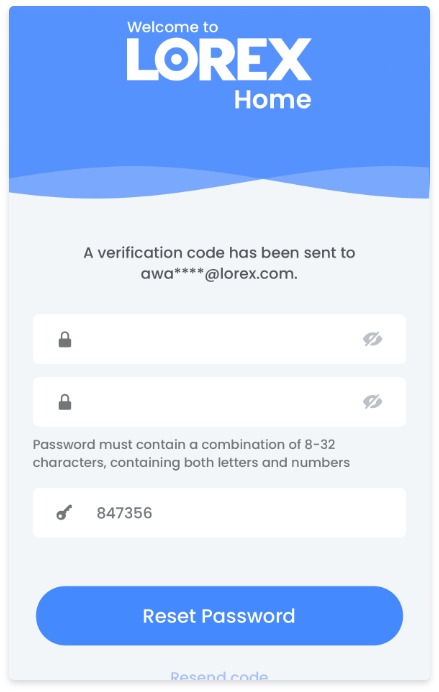
2. Enter your email, a new account password, and click Get Activation Code.
3. Enter the 6-Digit Verification Code sent to your email and click ok.
Method 2: Website
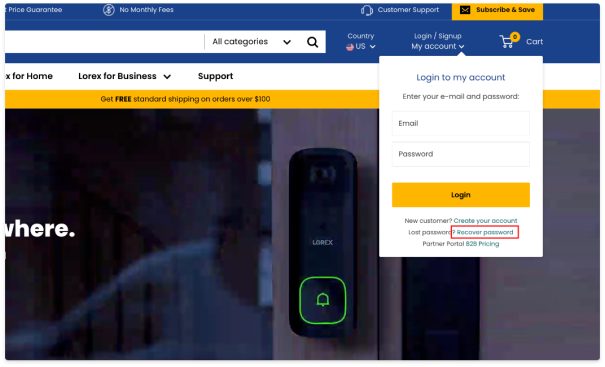
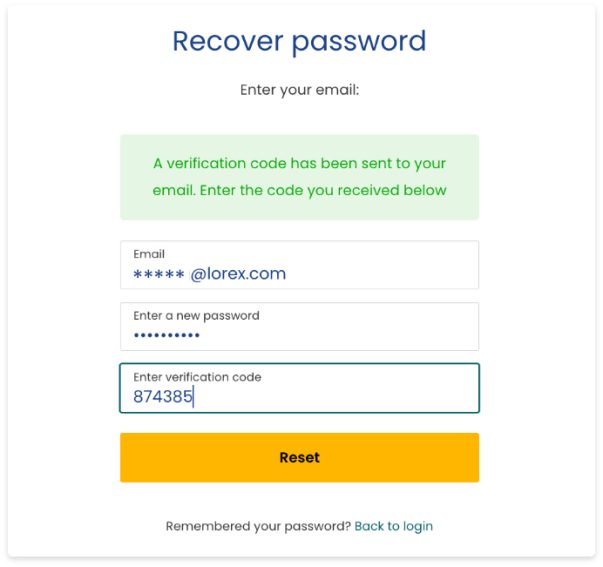
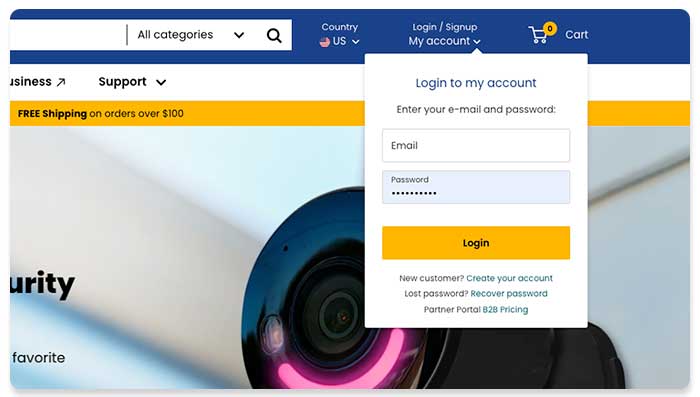
1. Click Recover Password from the Lorex Login page
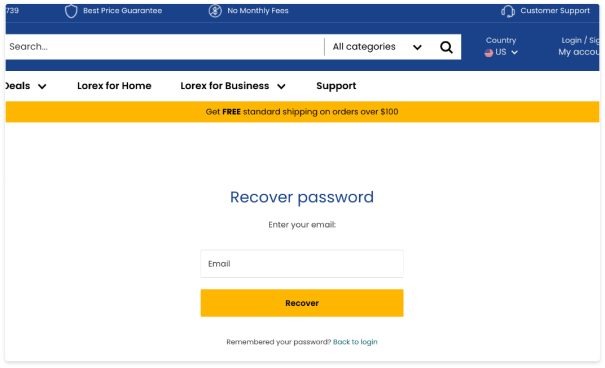
2. Enter your email address associated with your Lorex Account and click Recover
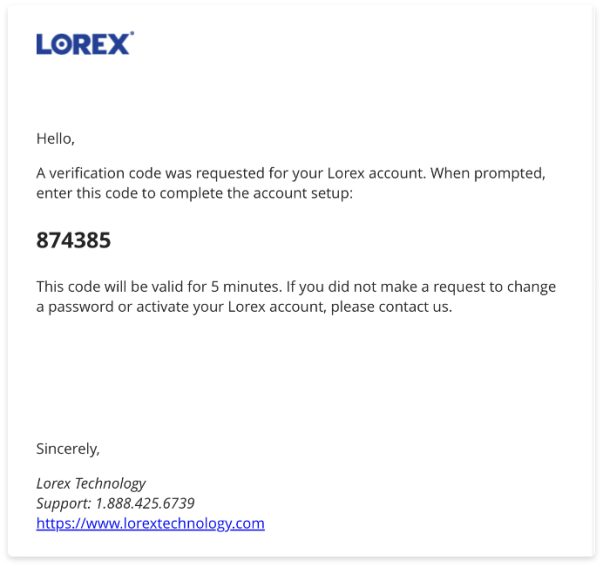
3. Check your email for your Verification Code.
4. Return to the Recover Password page and input your email address, new password, and verification code that you received.
5. Click Reset and then login using your new credentials.
Further Support
Resetting Your Lorex App password
Resetting Your Lorex Account Password
How to Reset Your NVR or DVR’s Password
Please follow the steps for the app associated with your Recorder
Lorex Recorders Using the Lorex App, Lorex Cirrus App or Lorex Cloud App
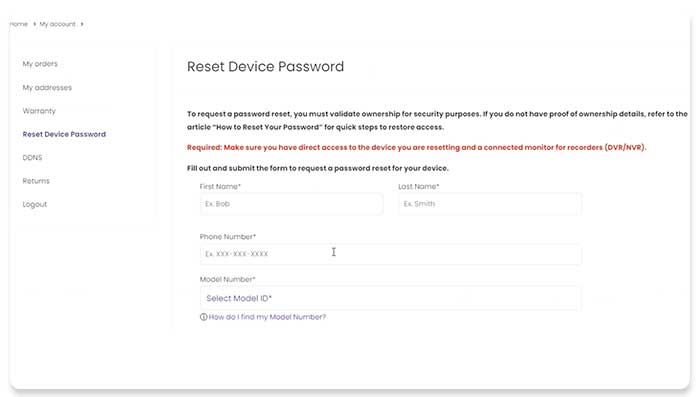
Request a temporary password from the website to reset your recorder’s password:
Note: It is necessary to register your product for warranty to request a temporary password for your Recorder.
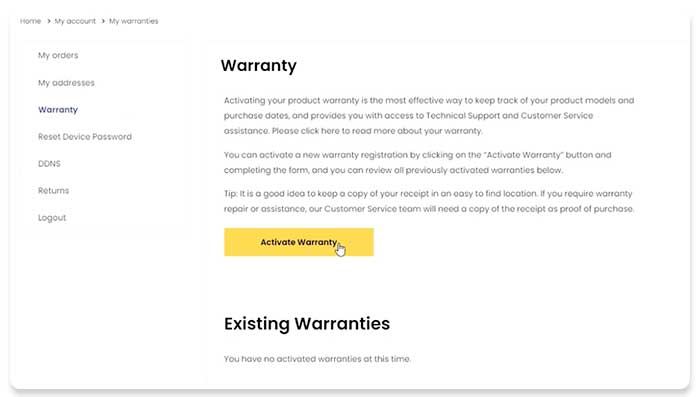
1. Login into The Warrany Section of Your Lorex Account:
2. Register Your Warranty:
⚬ Model Number
⚬ Serial Number (S/N)
⚬ Date of Purchase
⚬ Upload Bill of Sale
3. Reset Device Password:
⚬ First and Last Name
⚬ Phone Number
⚬ Model Number
⚬ Device ID
⚬ Serial Number (S/N)
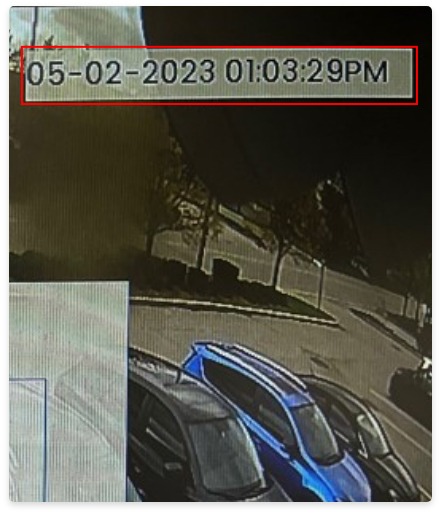
⚬ Date Displayed on Device
⚬ Upload Proof of Purchase
⚬ Upload Device Info Screen
⚬ Upload Information Sticker
4. Use Your Temporary Password:
Further Support
How to Change or Reset Your Recorder’s Password (Compatible with Lorex App)
How to Change or Reset Your Recorder’s Password (Compatible with Lorex Cirrus App)
How to Change or Reset Your Recorder’s Password (Compatible with Lorex Cloud App)
Support Hours Eastern Time:
Mon to Fri: 10:00AM – 9:00PM
Sat & Sun: Closed
How to Locate Your Recorder’s System Information
To complete the temporary password request form on the website, please gather the following information:
System Date: Located in the top-right corner of the screen once the recorder is powered on.
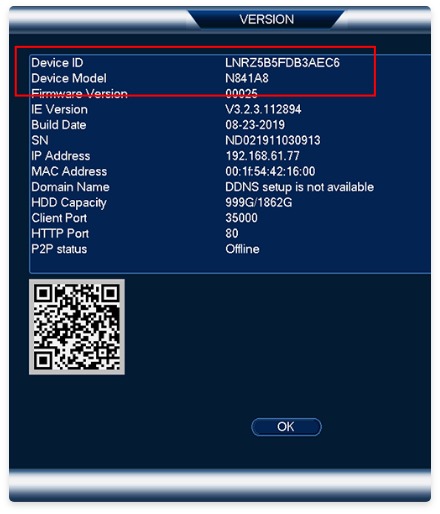
Device ID: Located on the QR code sticker attached to the outside of your recorder.
Device Model: Located in the INFO section from the Quick Menu of your recorder (the device ID can also be found here).
Once you have the Device ID at hand, please take a picture of the Device Info screen and the sticker with the serial number found on the unit.
How to Reset Your Smart Home Camera’s Password
To ensure your privacy and prevent any unauthorized attempts to gain access to your camera, there is no way to reset your smart home camera’s password. The camera will have to be reset to its factory default.
How to restart or factory reset your IoT Device:
Further Support
Wi-Fi Security Camera – How to reset your device
How to Reset Your IP Camera’s Password
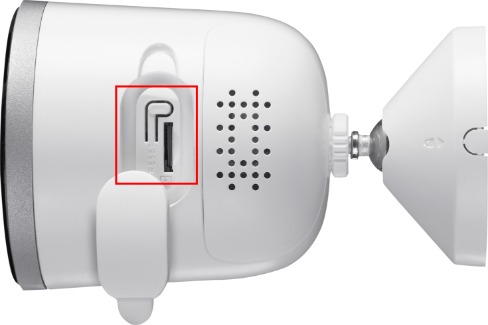
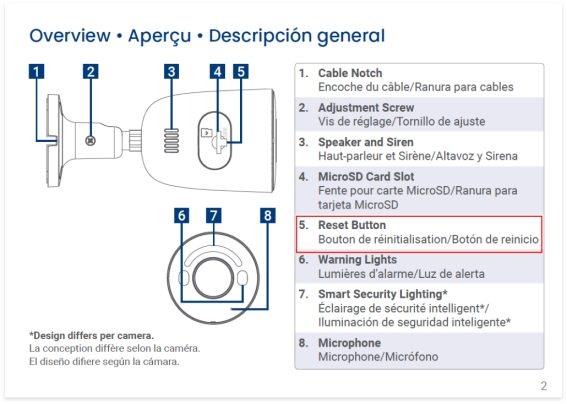
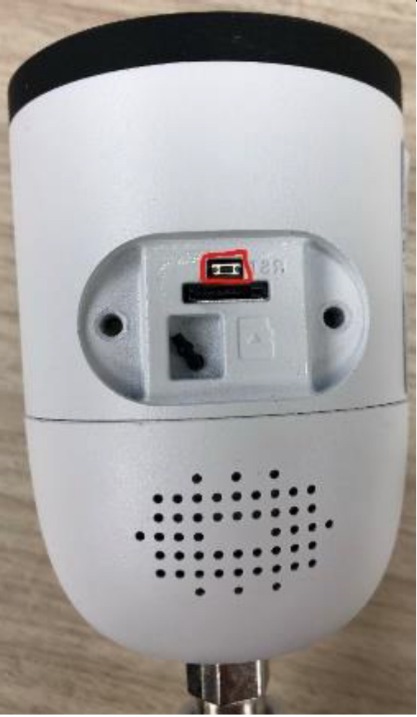
If you have forgotten the password to one of your IP security cameras, you will either need to reset the camera manually. Please see your camera’s documentation to see if there is a reset button.
Reset Button:
If your IP Camera includes a reset button, you can hold the button down to revert it to its default setting. This will allow you to set up the camera again through your NVR with a new password.
LNZ81P25, PTZ Series, P25 – 4K IP Wired Camera with 25x Zoom and IK10 Vandal-Proof Rating: Lorex Cloud App
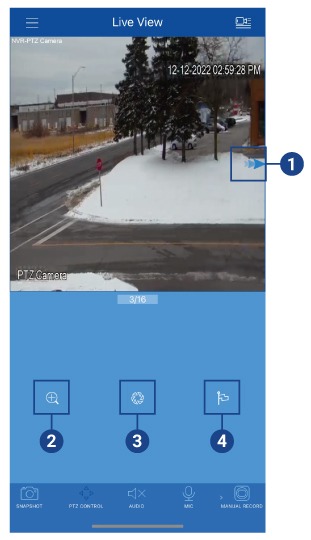
The following article provides instructions on how to control your your Pan-Tilt-Zoom Camera from the Lorex Cloud app.
Control the movement of your PTZ camera and access preset controls from the app (PTZ cameras required).
Access PTZ Controls
To access PTZ controls:
Using PTZ Controls
Locking Your Lorex Cloud App
If you would like to put a lock on your Lorex Cloud app, follow these steps to secure your app.
NOTE: The following instructions are shown using an iOS (Apple) smartphone. There may be some differences in the user interface when using an Android smartphone or tablet.
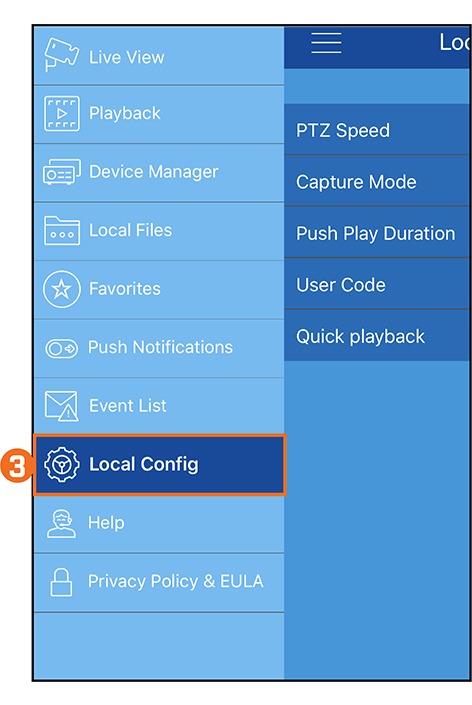
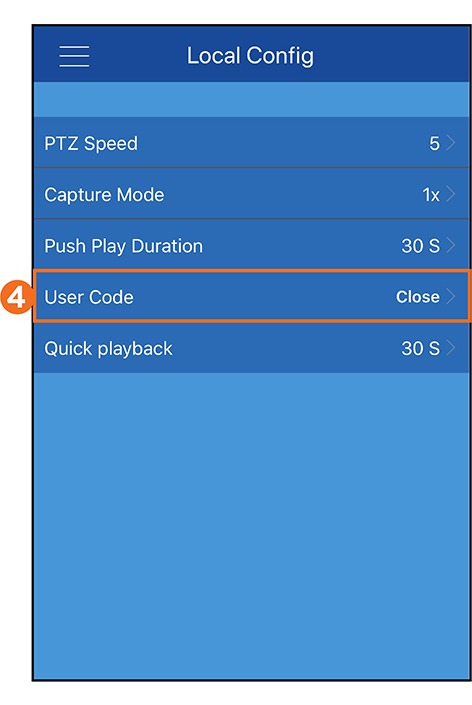
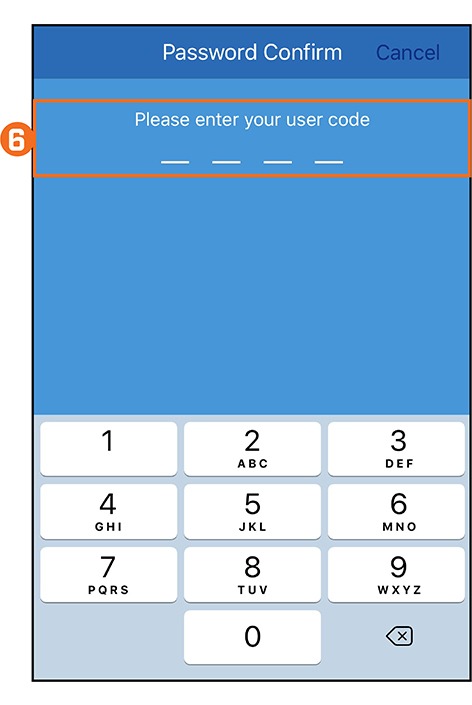
To turn on the User Code:
![]() Launch the Lorex Cloud app on your smartphone or tablet.
Launch the Lorex Cloud app on your smartphone or tablet.
![]() Tap the settings button
Tap the settings button ![]() on the top left corner.
on the top left corner.
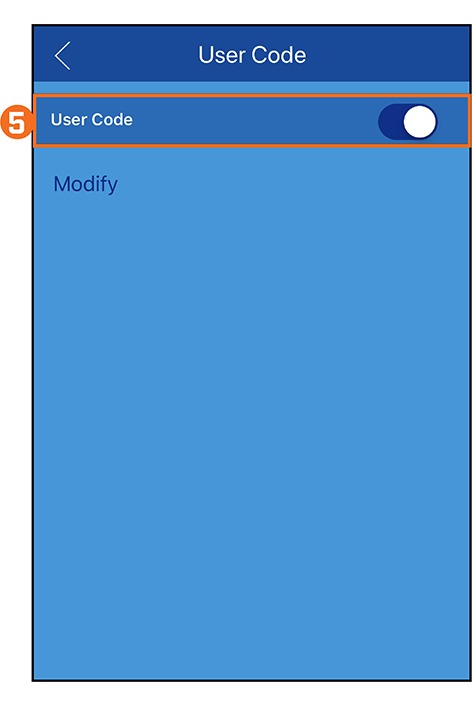
![]() Re-enter the 4-digit code to confirm.
Re-enter the 4-digit code to confirm.
Your User Code is now activated to access the Lorex Cloud app.
To turn off the User Code:
Follow the steps above from 1-4.
If you forget the user code to your Lorex Cloud app, you will need to delete and then re-install the app.
Lorex Cloud App: Activating deterrence features
Active deterrence features deter suspicious activities from occurring by flashing a warning light and/or sounding a siren from compatible cameras. You can manually control these features using the Lorex Cloud app.
NOTES:
REQUIREMENTS:
To activate deterrence manually through the Lorex Cloud app:
![]() From live view, double-tap the deterrence camera to open the channel in full screen.
From live view, double-tap the deterrence camera to open the channel in full screen.
![]() Tap the deterrence icons on the camera display to switch on/off the following deterrence features:
Tap the deterrence icons on the camera display to switch on/off the following deterrence features:
NOTE: The camera warning light / siren will automatically switch off after 10 seconds.
Lorex Cloud: Troubleshooting for migrated devices
Users who recently migrated from the Lorex Secure / FLIR Secure app to Lorex Cloud may experience minor performance issues, which are easily resolved. See below for solutions to common issues faced by new Lorex Cloud users:
App takes too long to connect / does not connect to cameras
If the Lorex Cloud app is not connecting to your cameras, it may be due to a pending firmware update on your recorder. If a newer firmware version is available, download and install the new firmware.
IMPORTANT: Do not power down or unplug the unit during the firmware upgrade process.
If no newer firmware version is available, please reboot your recorder and wait approximately 10 minutes before attempting to connect with Lorex Cloud again.
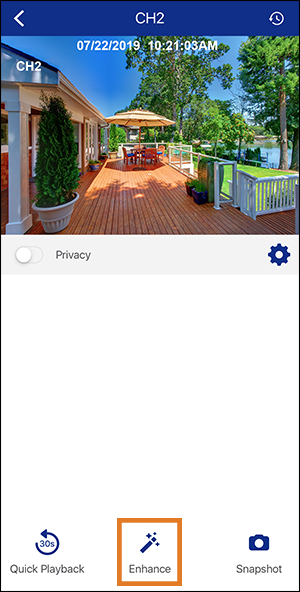
Cannot find video enhance feature
Users of Lorex Secure and FLIR Secure will be accustomed to switching between standard definition (SD) and high definition (HD) video using the Enhance button on the live viewing screen.
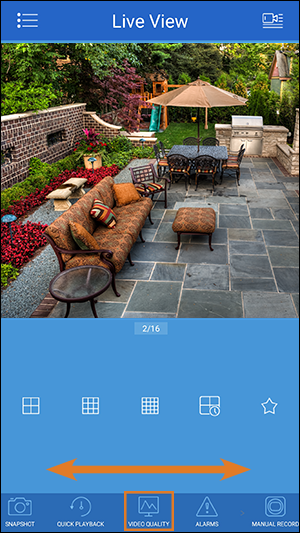
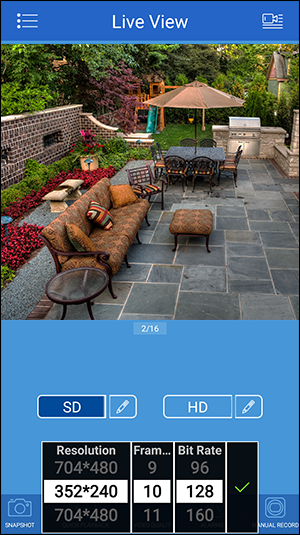
Lorex Cloud has an equivalent feature on the live viewing screen.
To change video quality in Lorex Cloud:
LOREX CLOUD APP
A professional app for professional security camera systems. Lorex Cloud keeps you connected no matter where life takes you.

