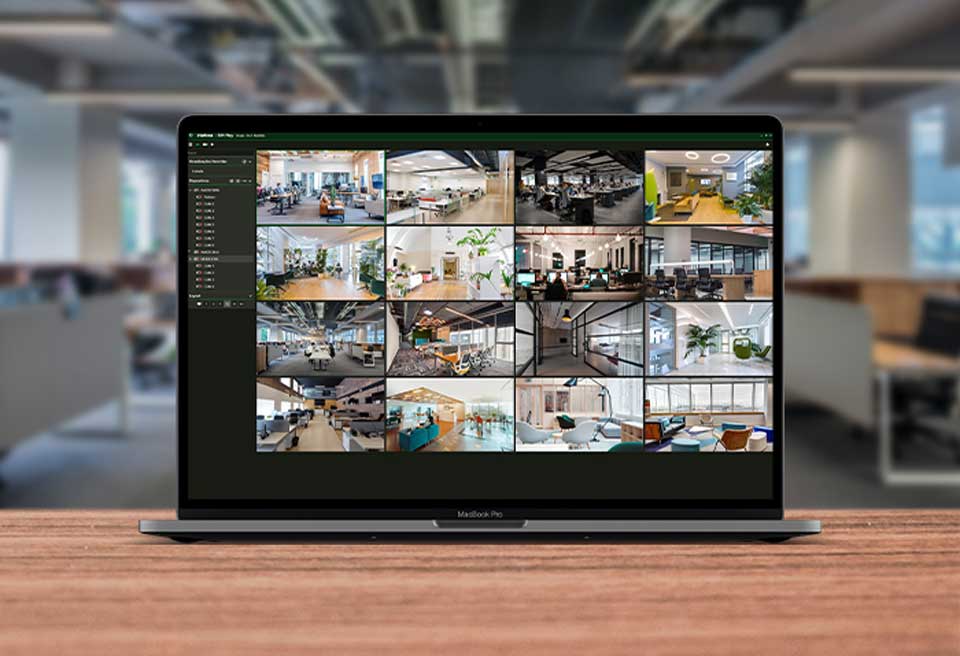
How to Configure Gamut CMS5 PC Software, Once you’ve added your camera to CMS5, you may want to change a few of the settings to get the most out of your new camera. Some of them may not apply to your specific camera, but this guide will help get you up and running if you’re using CMS5.
How to: Configure Your Camera with CMS5 PC Software
Once you’ve added your camera to CMS5, you may want to change a few of the settings to get the most out of your new camera. Some of them may not apply to your specific camera, but this guide will help get you up and running if you’re using CMS5.
Entering Device Config Menu
Checking SD Card
Motion Recording
Enable Audio
Changing Camera Parameters
Set Camera Time
Playback Footage
How to Configure Gamut CMS5 PC Software
Read More : Gamut Surveillance Client Guide
Entering the Device Config Menu
For all of the steps below, you’ll have to first enter the ‘Device Config’ menu from the main page.
You will then have to select the camera from the ‘default group’ on the left hand pane.
From now on, whenever we talk about navigating to the ‘Device Config’ menu, it means following these steps.
Checking SD Card
If your camera has SD card support, you can check the status of the card and format it under the ‘Disk Manager’ window under ‘Device Config’. A window like this means an SD card cannot be detected:
If this is the case, ensure the memory card is inserted correctly in to the camera, and then power the camera off and then on. You should see some information populate the card field, such as a total size larger than 0MB. If the card shows an ‘Error’ in the status, you can highlight the row and click ‘Format’ on the side to re-format the card to work in the camera.
Note that the card gets formatted in a way that the CMS5 software can read, through the camera. If you remove the card and insert straight to your computer, it wont be able to be read and your computer will try and format the card before reading, which will remove all of the data.
Motion Recording
If your camera has a built in SD card reader, you can set up motion recording to capture events of interest, rather than sifting through hours of continuous footage. To enable this, navigate to ‘device config’, then select your camera on the left hand side.
Enter the ‘record config’ menu and ensure that there is a tick in the ‘detect’ box. You can also set a schedule in the time section for when you want recording events to occur. By default, its set as 00:00 to 23:59, which is 24 hours a day. Click ‘apply’ to update any settings changes.
Enable Audio
For cameras with a built-in microphone, or with an external microphone attached, you will have to enable audio for the camera. Now go to the encode option, you will see the mainstream Collom and extra stream Collom with four tick boxes at the bottom.
You will want all four of these boxes to be ticked and then press the apply and ok button.

On the live camera feed, you will see a speaker icon towards the top which you can click on to unmute the sound.
That’s everything set up, you will now be able to get audio on the live video feed from your camera.
Changing Camera Parameters
All of the cameras we sell will have preset parameters that will be suitable for most applications and usually won’t need to be amended. If you find that you need to change any settings, go to ‘device config’ and then ‘Camera Param’. Some of the settings are explained below:
Set Camera Time
To keep an accurate log on when events have occurred, and to make searching for files easier, it’s best to keep the correct time set to the camera. Luckily, this is very simple to do. Navigate to the ‘Device Config’ window, and enter the ‘System Config’ menu.
Enter the system time in this menu apply these settings.
Playback Footage
If you have a camera with a built-in SD card, the footage will need to be played back and downloaded through the ‘Playback’ menu in CMS5.
Select your camera from the right-hand side under the ‘Device’ menu.
Then set the parameters for the footage that you want to view. By default, the time parameters will be for today’s date, but you can modify this range, then click ‘search’.
The list of files and times will display on the bottom bar, as shown below.

Setting up your Gamut Pinhole IP Camera
Before You Begin
Test the Wi-Fi connection strength at the site of your pinhole camera using a smartphone, tablet or laptop. We suggest that you have a signal strength of at least 30%.
Download the XMEye app to your smartphone or tablet.
Download for iOS Download for Android
Preparing Your Wi-Fi Pinhole Camera
Connecting the Camera Directly
When the camera is powered up, open the Wi-Fi settings on your smartphone or tablet and the following name should appear beye_***. Select and enter the password 1234567890
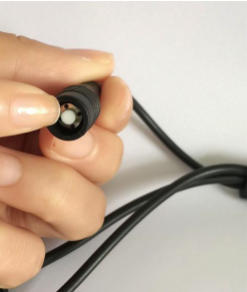
Should this Wi-Fi Network not appear it may mean that you need to reset the camera. To do this press and hold the reset button for 15 seconds on the camera as shown below.
Once connected, open the app and select the blue wireless icon at the bottom of the screen.
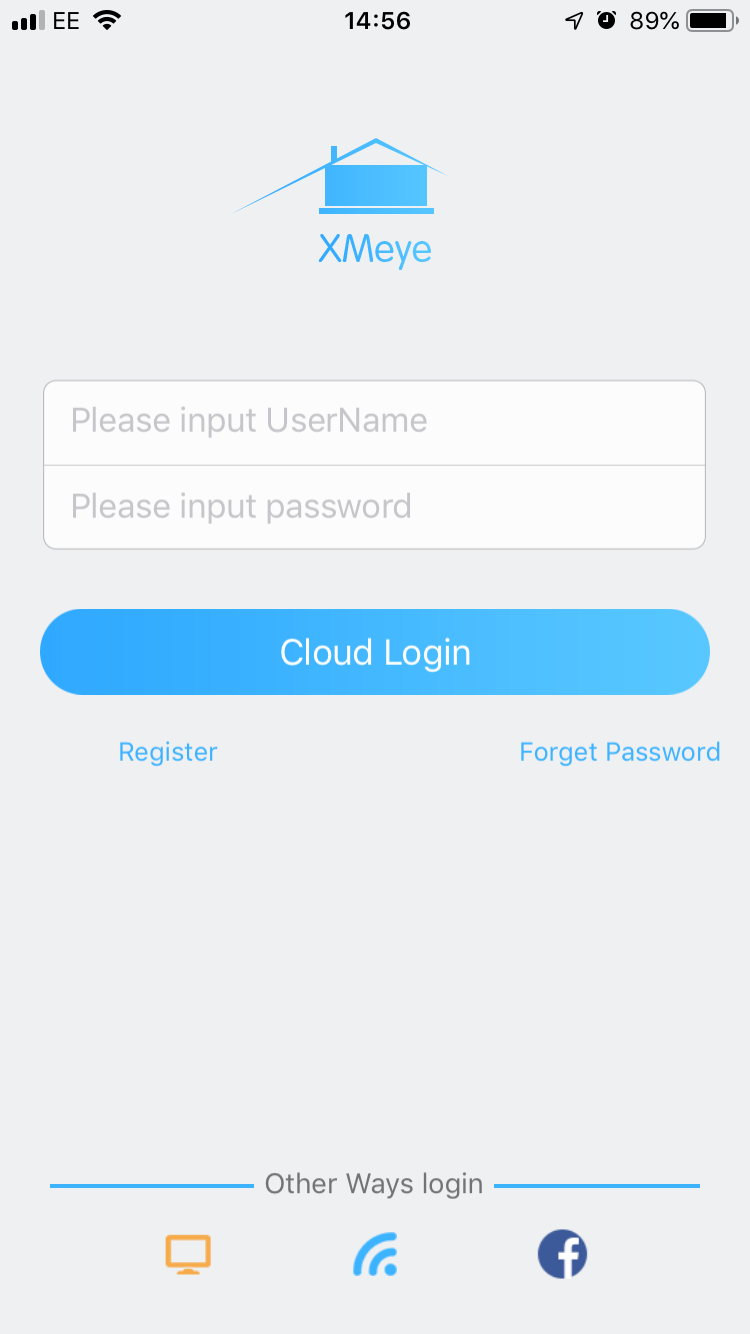
Your camera will be listed, so simply tap on it to check that you are receiving live images.
This method of connecting has limited functionality as you won’t be able to view the camera remotely or from other devices on your network. Furthermore, the range of the Wi-Fi from the camera in this mode is limited.
Therefore, we would recommend to now connect the camera to your Wi-Fi network.
Connecting the Camera to Your Wi-Fi Network
First, ensure your smartphone or tablet is connected to the Wi-Fi network you want the camera to use.
Double press the white button found on the end of the cable on the camera.
Make sure you have the list of available Wi-Fi networks displaying on your device. You should see the beye_*** network disappear at the point of double pressing the button on your camera.
If this does not disappear you will want to turn the Wi-Fi off on your camera and then turn it back on again.
Next, open the app on your phone and tap the orange monitor/TV icon at the bottom (left).
Now select the + icon in the top-right and tap Quick Configuration.
Enter your Wi-Fi network password and select the two options Ensure the indicator and Device Operation.
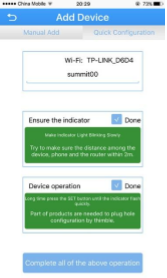
Tap Complete all of the above operation at the bottom of the screen.
You will be prompted with a question asking whether your device is post-2015; just select Yes.
Wait for the app to scan the network and your device should show up as a green icon.
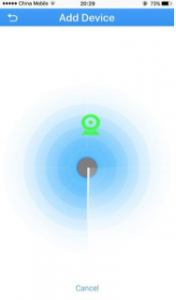
Tap this icon and it will automatically fill out all the details needed to connect to the camera.
Select OK at the bottom of the screen.
Your device will now show in your device list. Tap on the device in the list and then the name which appears beneath to view your camera.
Hints & Tips
How to: Configure Port Forwarding on a Gamut Recorder
In this guide, we will go through setting up your Gamut Hybrid DVR for remote access so you can view it on your computer, Android and Apple mobile devices. Please follow through every step of the guide and make sure you keep notes of the IP Address correctly as these are needed.
On your Android and Apple mobile devices, you will want to download the app called RXCamLinkPro.
Step 1: Setting Up Your LAN (Internal Network)
Step 2: Setting Up External Network Access
* Go to PortForward.com, which has a comprehensive list of guides on how to forward ports for almost every router and hub ever manufactured. Simply select your router from the list and then click the “Click here to skip this advertisement…” link in the top right-hand corner of the next page. Then click the “Default Guide” link provided.
Configuring Static IP or Dynamic DNS
The last step in configuring your DVR involves finding a way around the fact that your external IP address (IP Address 3 from Section 2, Step 1 of this guide) changes on a regular basis – think of it as writing a letter to someone who moves house every week! There are 2 ways of doing this, using either a Static IP address or a Dynamic DNS address.
The easiest method is using a static IP address, but this can be expensive and not all internet service providers can facilitate it. To do this, call your ISP and ask them to arrange it for you (it’s not something you can easily do). Most ISPs will charge for this service, but once set up your external IP address (IP Address 3) will never change.
To use a dynamic DNS service takes a little more setting up but is usually cheaper. The DVR is compatible with several DDNS providers, but we recommend Dyn.com (not affiliated with SpyCameraCCTV). Unfortunately, we cannot provide a step-by-step setting up guide for registering with these services.
Need Help Setting Up?
If you are stuck and need extra help, in most cases our technical team can configure your DVR web access for you. We have two services available depending on the level of support you wish to have.
How To: Connect To Your Gamut Recorder on Your iOS Device
Now that the port forwarding has been configured correctly you can start setting it up on your Apple Mobile Device. If you still need to configure this then you can visit here to set this up.
The first step is downloading RXCamLinkPro onto your phone from the Apple App store.
Once the app has finished downloading you want to load it up so that you can configure it. If you are wanting to view the camera while you are away from home you will want either a DNS address that you have set up or your external app address which can be located at canyouseeme.org.
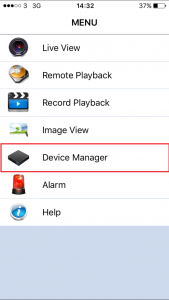
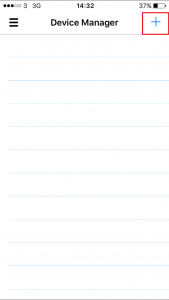
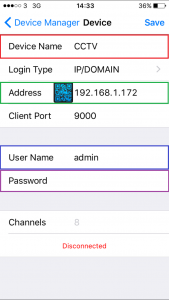
With all the settings input correctly it will automatically take you over to the live camera view for your system.
How To: Connect To Your Gamut Recorder On Your Android Device
Now that the port forwarding has been configured correctly you can start setting it up on your Android Mobile Device. If you still need to configure this then you can visit here to set this up.
The first step is downloading RXCamLinkPro onto your phone from the Google Play store.
Once the app has finished downloading you want to load it up so that you can configure it. If you are wanting to view the camera while you are away from home you will want either a DNS address that you have set up or your external app address which can be located at canyouseeme.org.
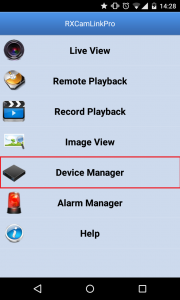
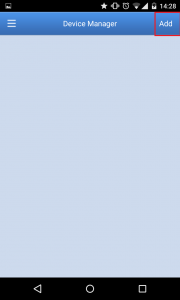
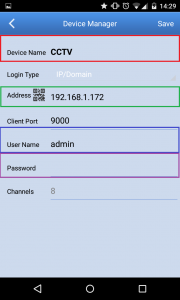
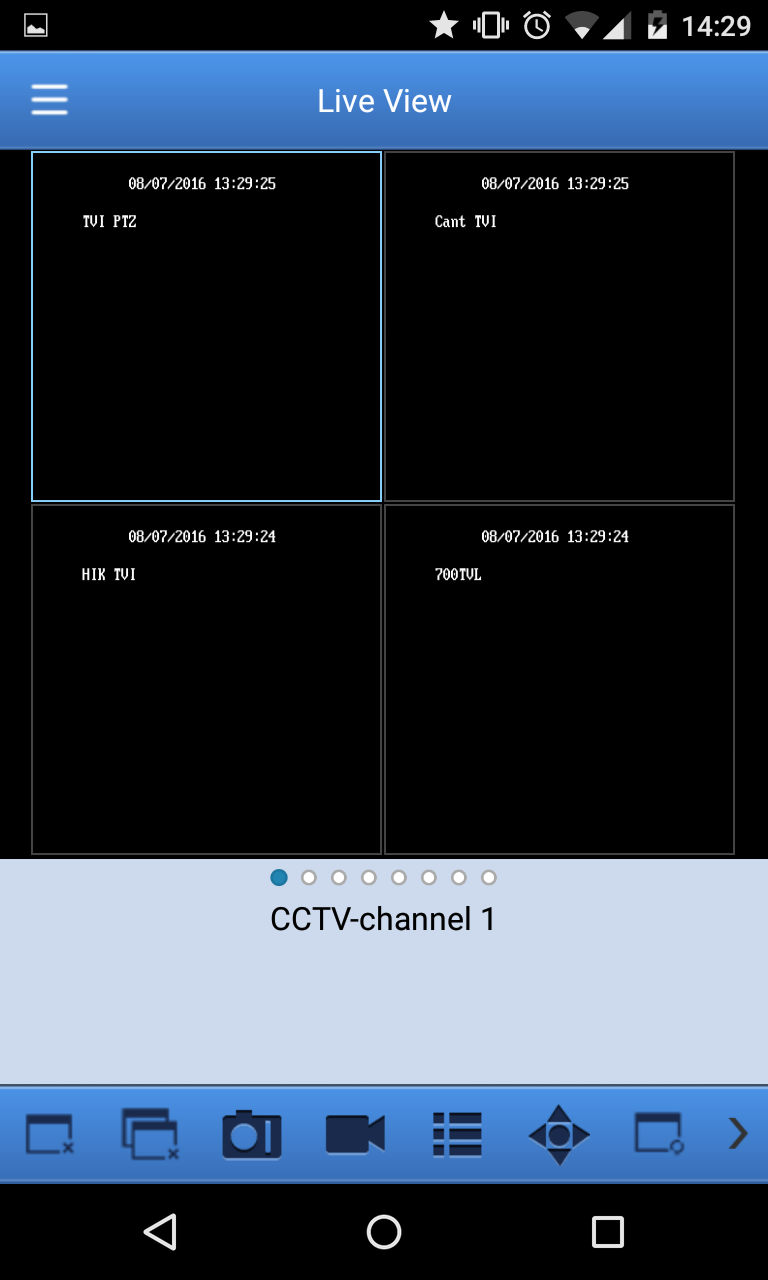
With all the settings input correctly it will automatically take you over to the live camera view for your system.
How to use two way audio on the Gamut Wireless Battery Powered CCTV System
Purpose of the Guide
This guide will show you what to do to use two-way audio between the wireless cameras and your smart phone.
Before You Begin
You will need to have the recorder set up, connected to the internet, and paired to the cameras.
You will also need to connect your phone to the recorder by installing the RXCamView app.
Let’s get Started
Step 1
The first step is to activate the audio for each camera in the menu of the recorder. This is under ‘Channel’ in the main menu of the recorder.

Step 2
Now we need to make sure the speaker icon is turned on in the app when viewing the live feed:
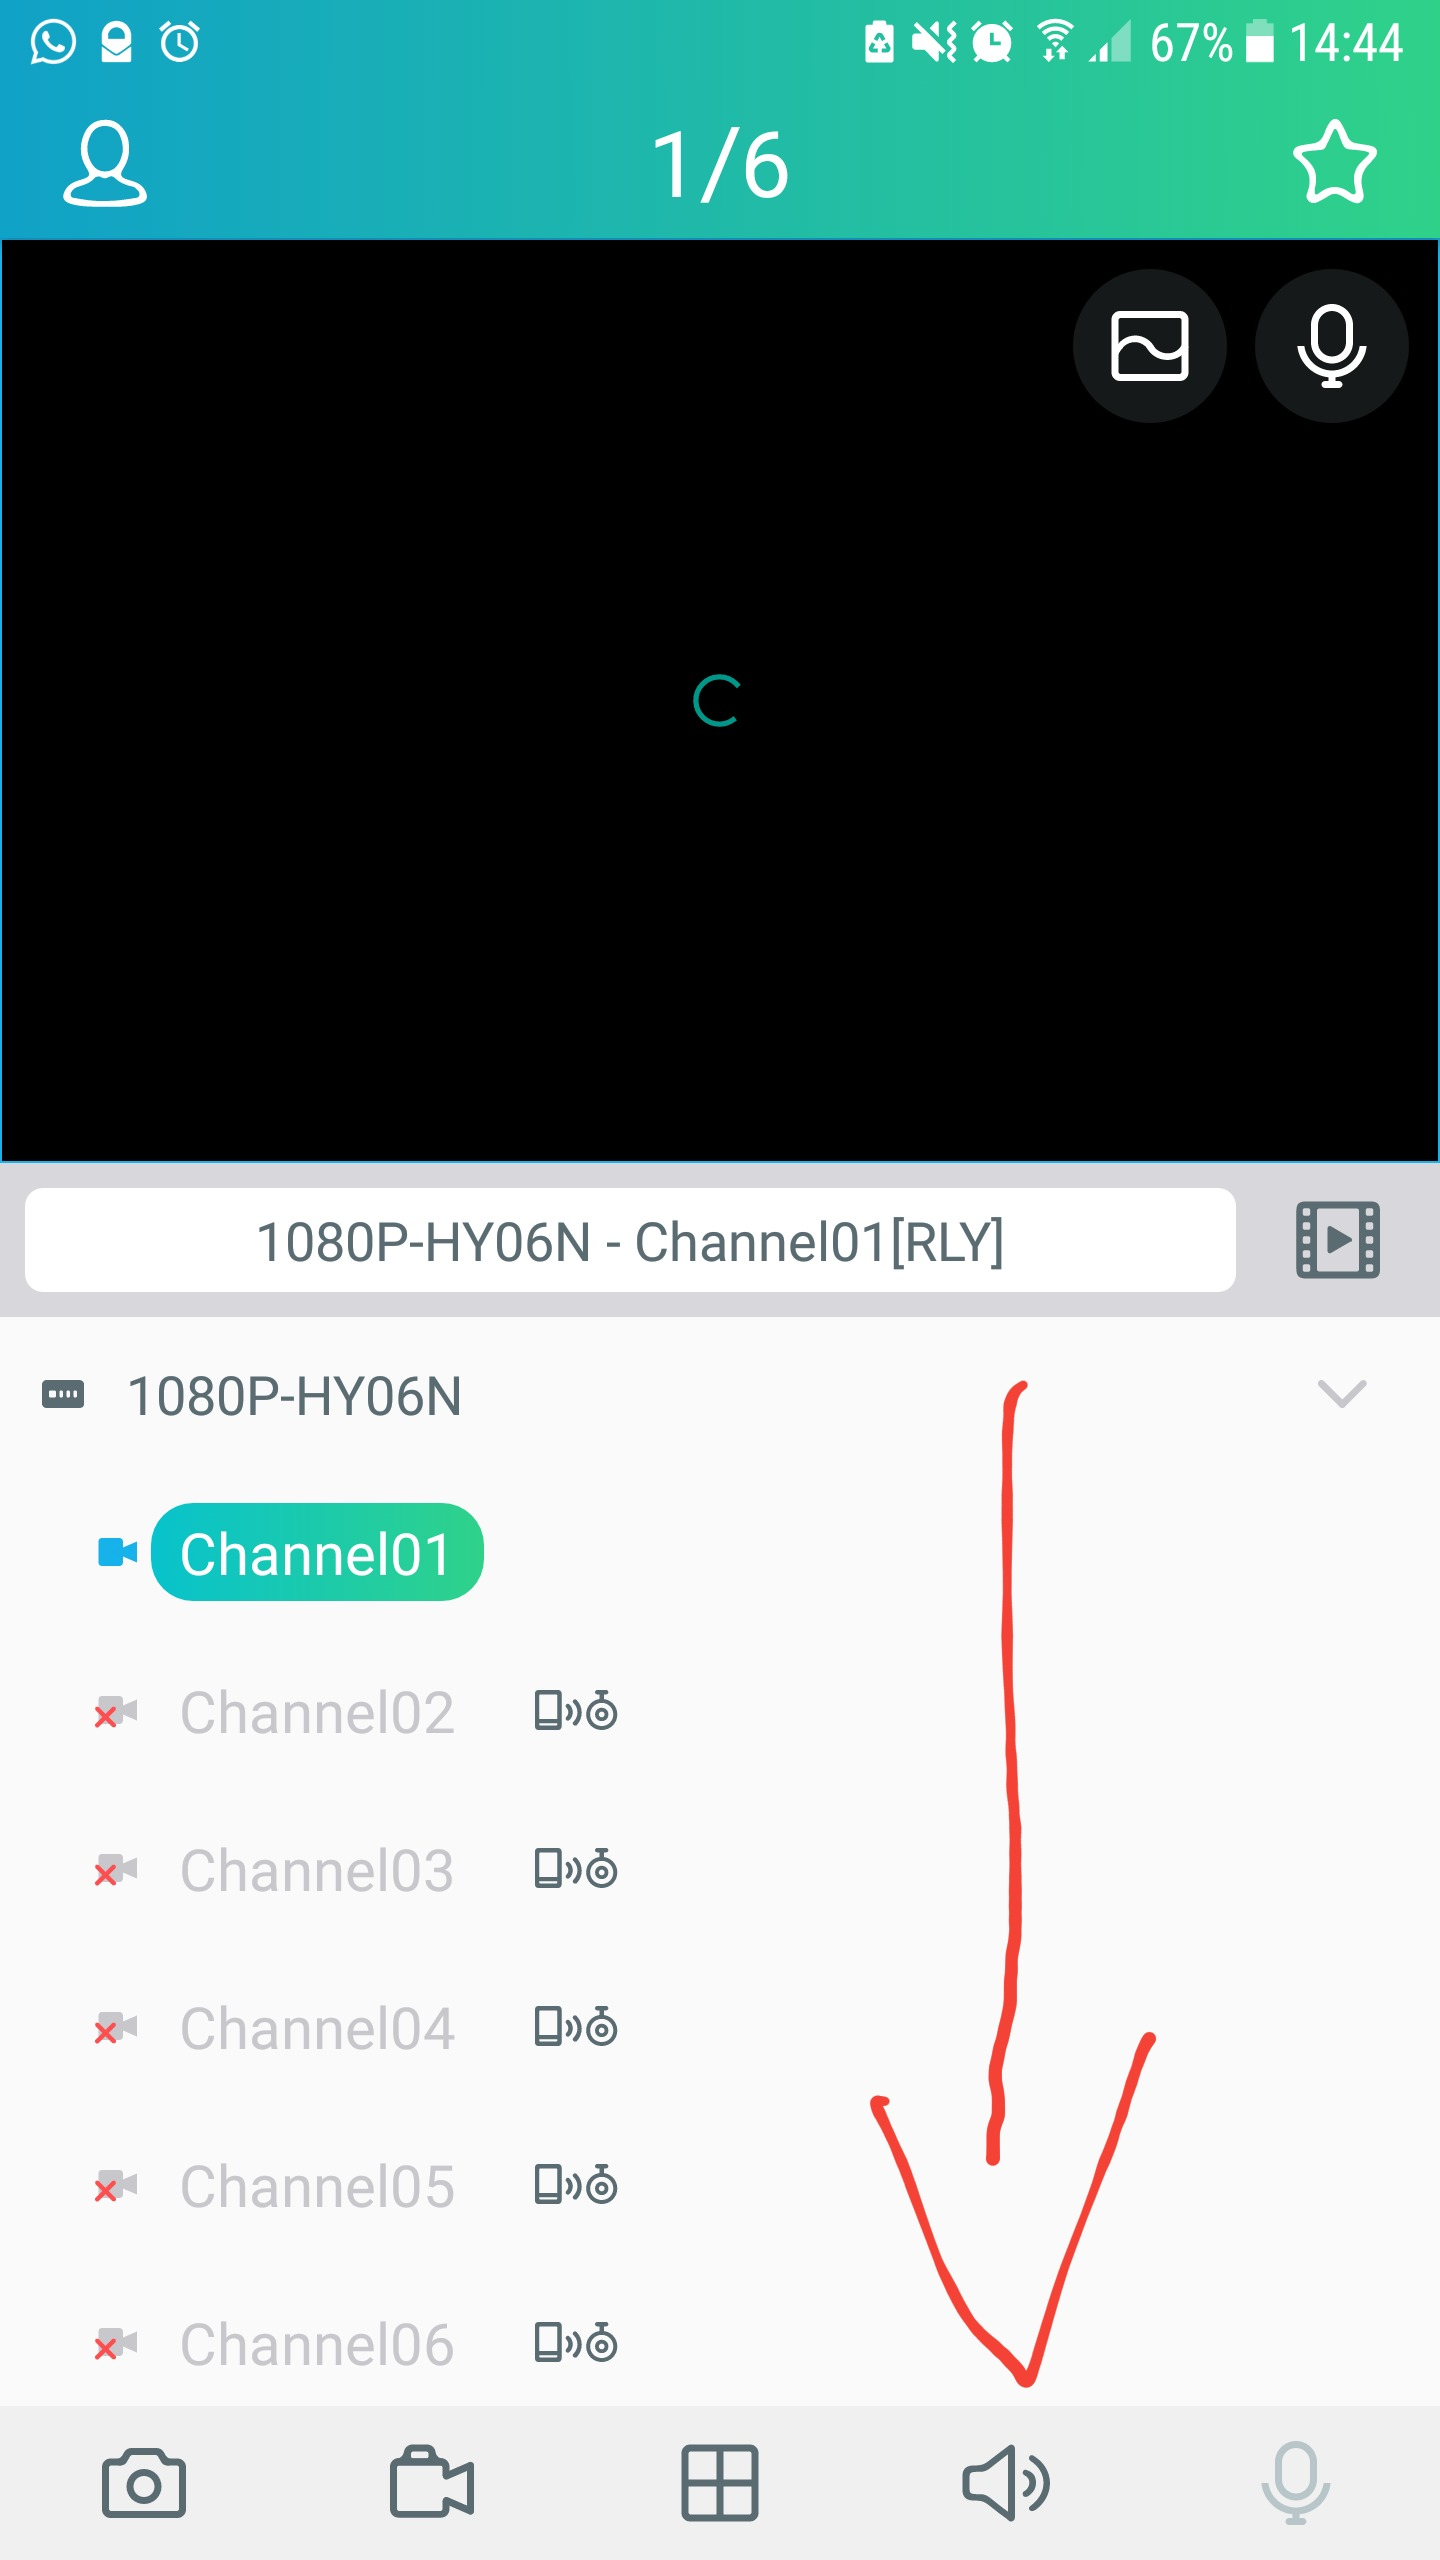
Step 3
And finally, you just need to make sure that the camera has been activated by motion and is playing the live feed at the time, if it is in standby mode it won’t record any audio to send to the smart phone.
How to open the SPYPIR32WFGB / GT4TV2PIRGB
How To: Add Your Gamut IP Camera to CMS5 Software on Windows PC
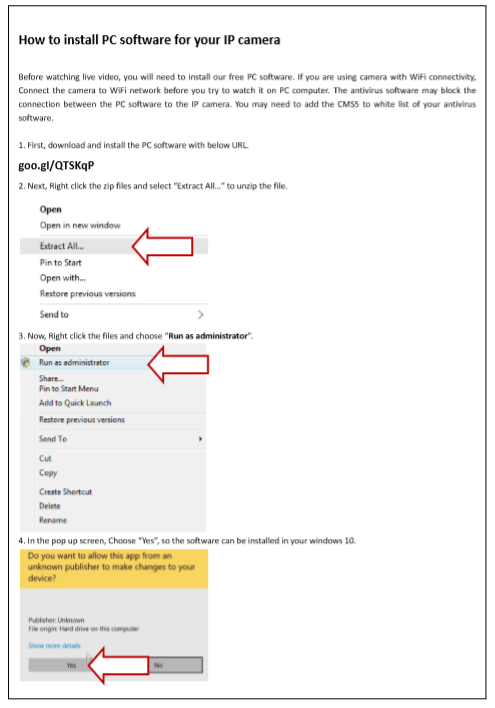
Thank you for purchasing one of our Gamut IP cameras! In this guide we will get the camera feed up on your Windows computer. Some basic computer knowledge – such as downloading and installing new programs – will be useful.
Before You Begin
Adding Your Camera to the Software
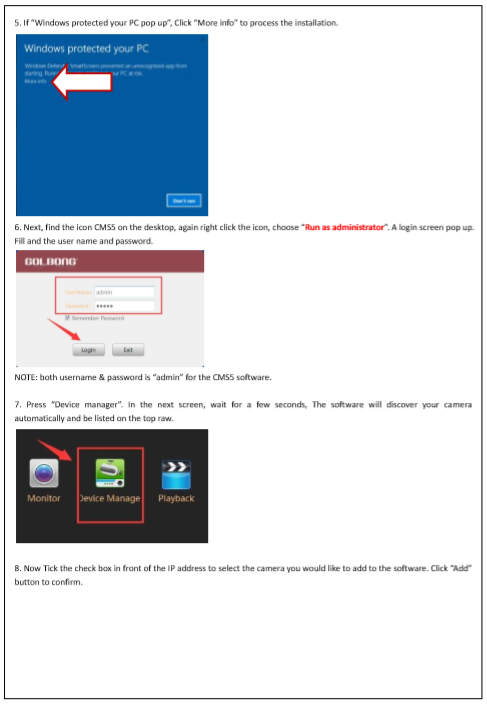
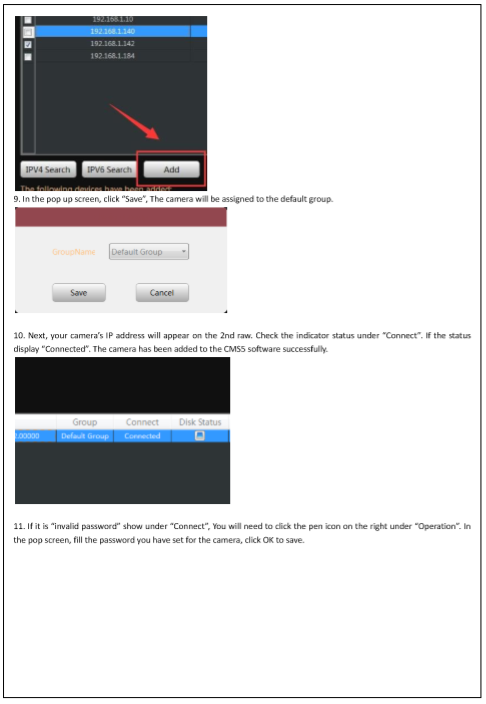
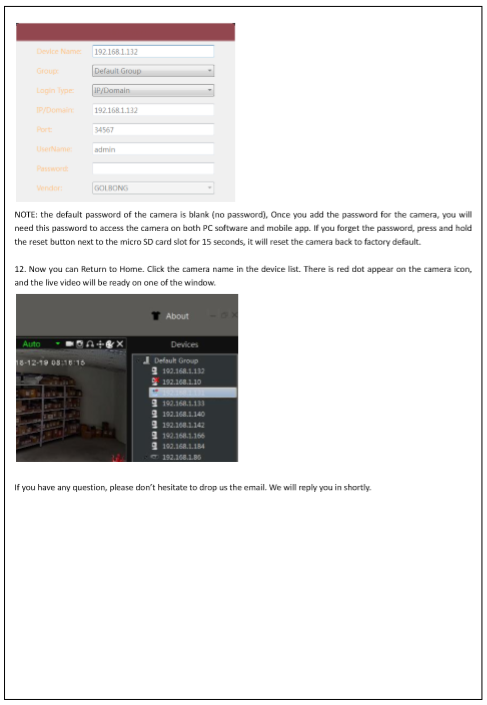
Load up the CMS5 software. Your default UserName and Password will both be “admin”, allowing you to click “Login” right away.
Select your Wi-Fi network from the list and tick the DHCP box.
Input your Wi-Fi password into the PPPOE Password box and press the apply button.
Your camera will be connected to WiFi, you should be able to disconnect any Ethernet cables and still pick up the camera. Usually, it will take a minute or so for these changes to reflect in the software.
