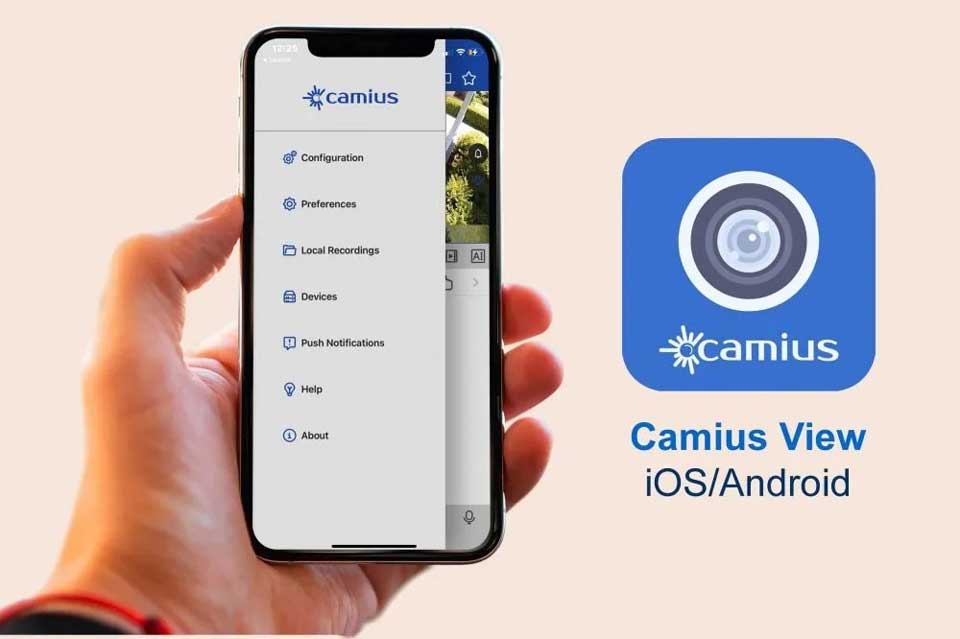
Camius View is the App to use with your Camius IP cameras, NVRs, DVRs, and Wireless Systems. Camius View acts as a full surveillance software, with support for Push Notifications, Live Video Streaming, Video Recording and Playback, Remote Video Playback, Snapshots and PTZ control, in addition to a slew of other device-specific configurations.
Camius View is the smartphone app to view & control your DVR, NVR, and IP security cameras for home and business:
The Smartphone Security Camera App Camius View offers complete access to your cameras from any location. The mobile app is available on iOS and Android App stores and is ready to link to your security cameras. You can use your smartphone security camera App to view and playback any Camius security camera. Download and install the Camius View iOS or Android app on your smartphone device:
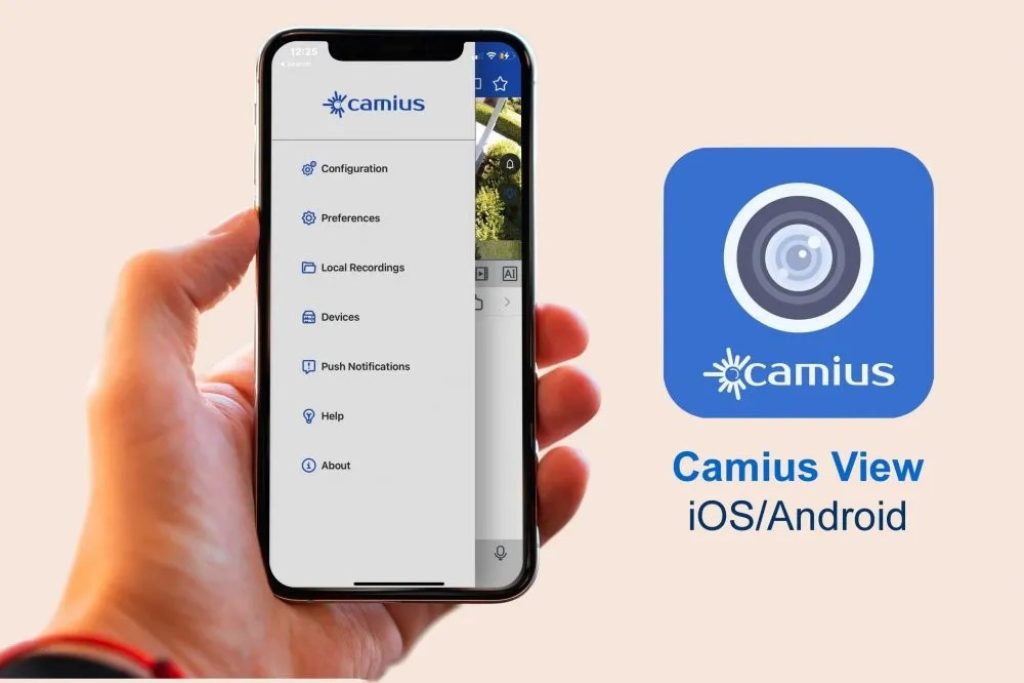
How to add your PoE camera or Surveillance Recorder to the Camius NVR, DVR, or IP camera app
Download the Camius View app on the iOS or Android app store on your phone or tab.
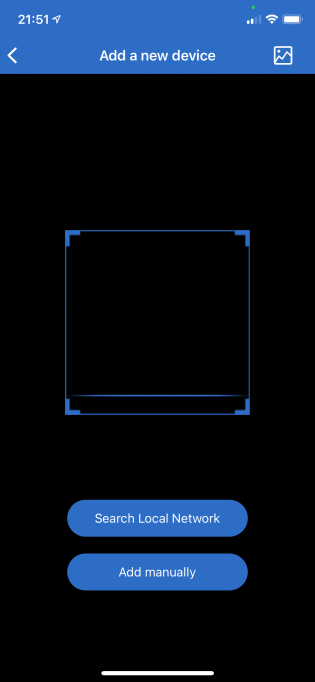
On the first run, the app will require network access and other permissions; once authorized, the app will start a tutorial highlighting the add button.
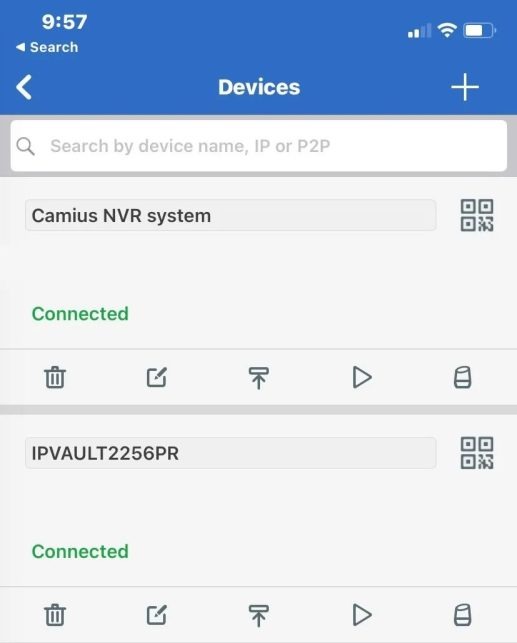
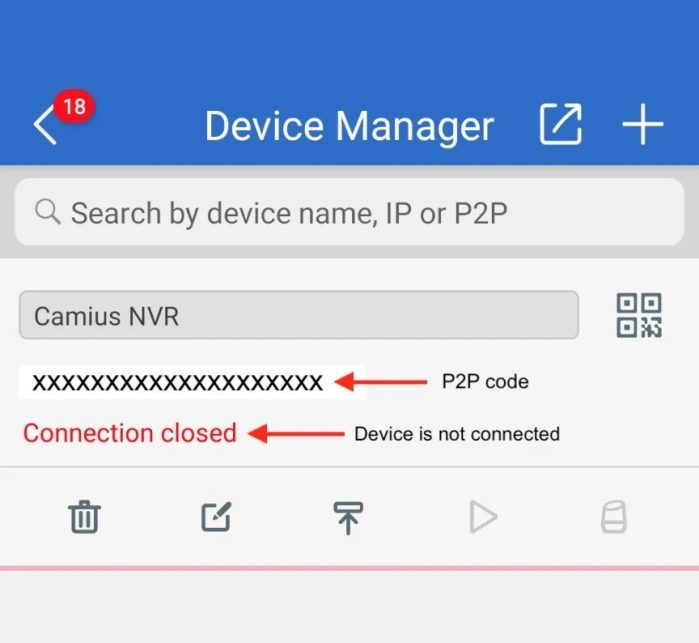
To get to the add device button later, Tap on the top left menu icon and then on Devices to open the Device Manager page.
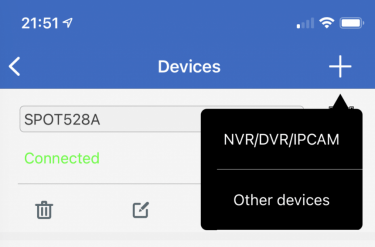
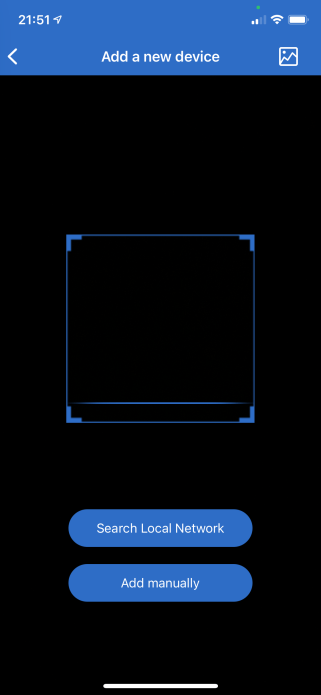
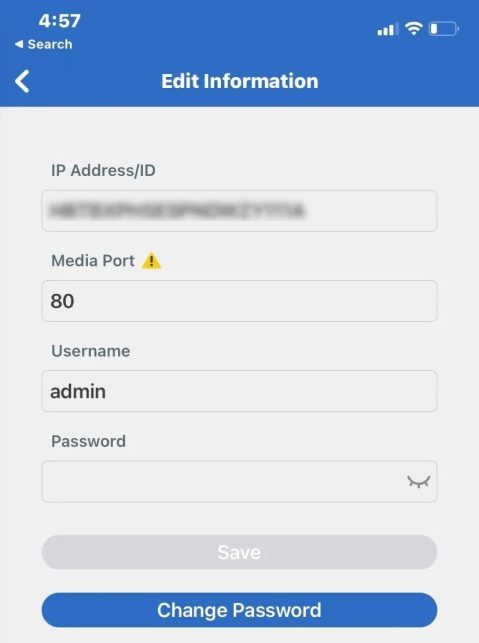
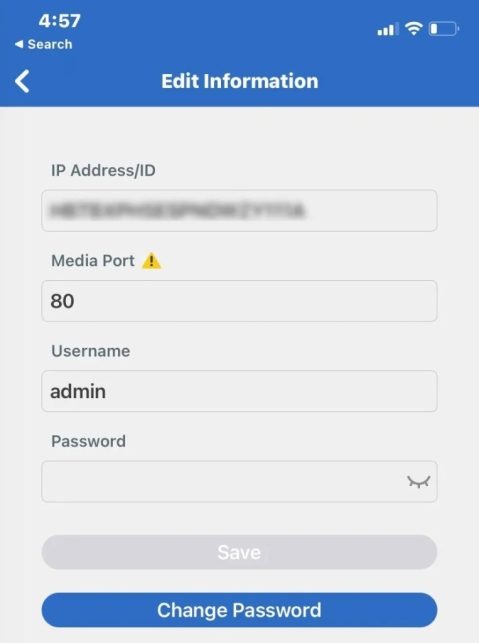
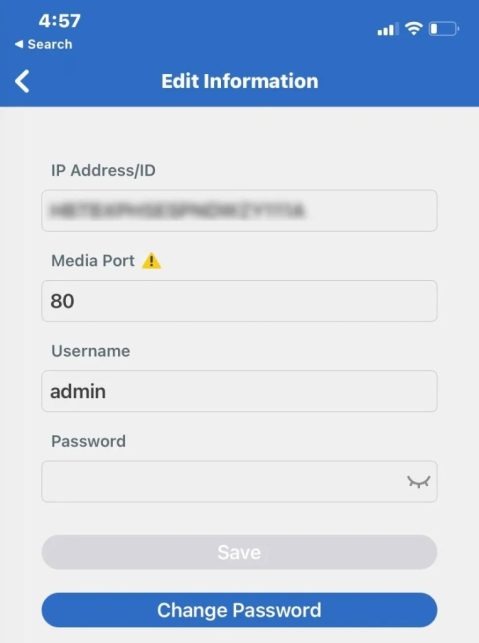
Option 1: Search Online networks to add devices from your network on the device page, enter the password you set earlier, port 80 (for R-series recorders and IP cameras), and save. For the devices of non-R series, port 9000 is required.
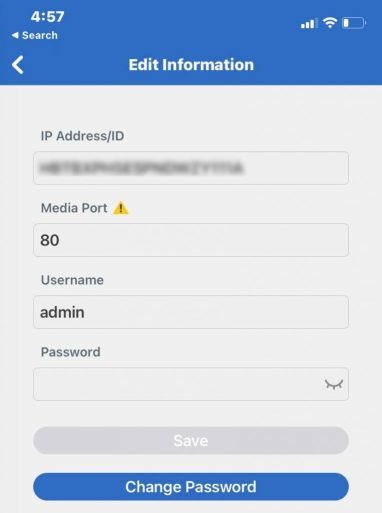
Camius View Smartphone App 51
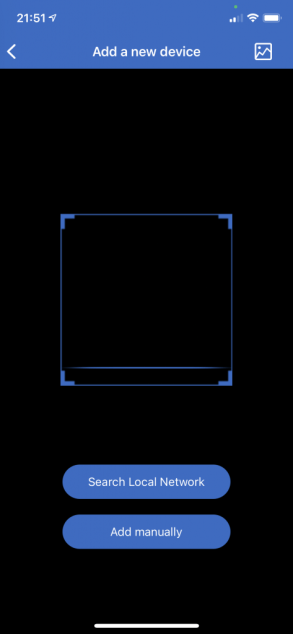
Option 2: While you have the QR code scanner active, point your smartphone’s camera to it and snap. To check if your NVR, DVR, or IP camera is online, disconnect your phone’s Wi-Fi briefly and let the app reload
You can also add your Camius device manually.
How to Use Camius View app
Read More : Hikvision How-To Tutorials Part1
DVR, NVR camera system Live View
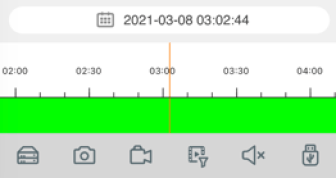
Playback
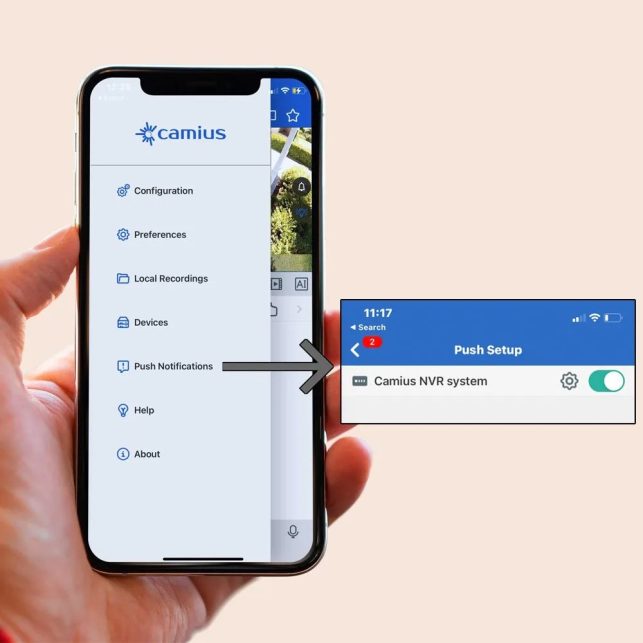
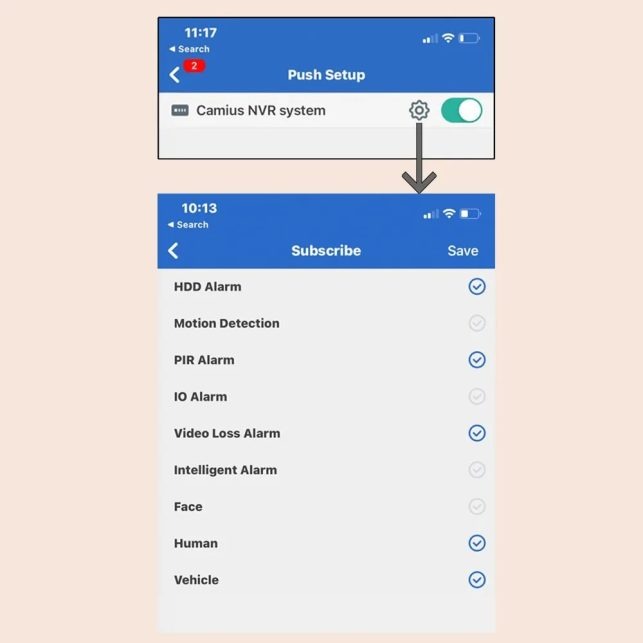
Enabling Push Notifications
How to add a Camius IP camera, DVR, or NVR to the Camius View smartphone app?
Download and install the Camius View iOS or Android app on your smartphone or tablet.
On the first run, the app will require network access and other permissions; once authorized, the app will start a tutorial highlighting the add button.
To get to the add device button later, Tap on the top left menu icon and then on Devices to open the Device Manager page.
Option 1 – adding a Camius security device using Search Local Network
Ensure your iPhone, iPad, Android smartphone, or tablet is connected to the same local Wi-Fi network as the Camius NVR, DVR, or IP camera device.
Option 2 – adding a Camius security device using QR scan code (Recommended)
Live View
Playback
Push Notifications
Tap on theicon and then the Push Notifications icon, select the device and enable the desired per-channel motion detection alerts, disk error detection alerts, and more.
More about:
Why can’t I access my Camius IP cameras, DVR, and NVR on my Camius View app?
If you can not access your Camius IP cameras, DVR (digital video recorder), or NVR (network video recorder) on the Camius View smartphone app, please check the below:
1 – Check if you are using the latest version of the Camius View app
On the App’s ‘Devices‘ page, make sure your recorder is added using P2P (ID) instead of IP (IP Address), and if in doubt, delete it and add it again.
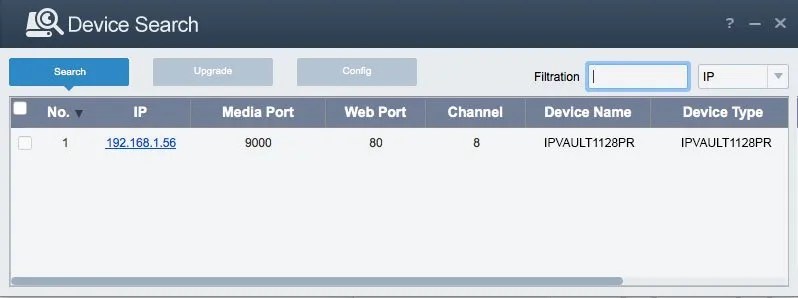
In the Media Port, make sure to enter the right port number:
2 – Make sure you’re connected to a reliable network on your phone
3 – Check if your Camius IP camera or recorder is connected correctly to the LAN (Local network).
4 – Check for the IP address conflict
5 – Reset the Network settings of your Camius device
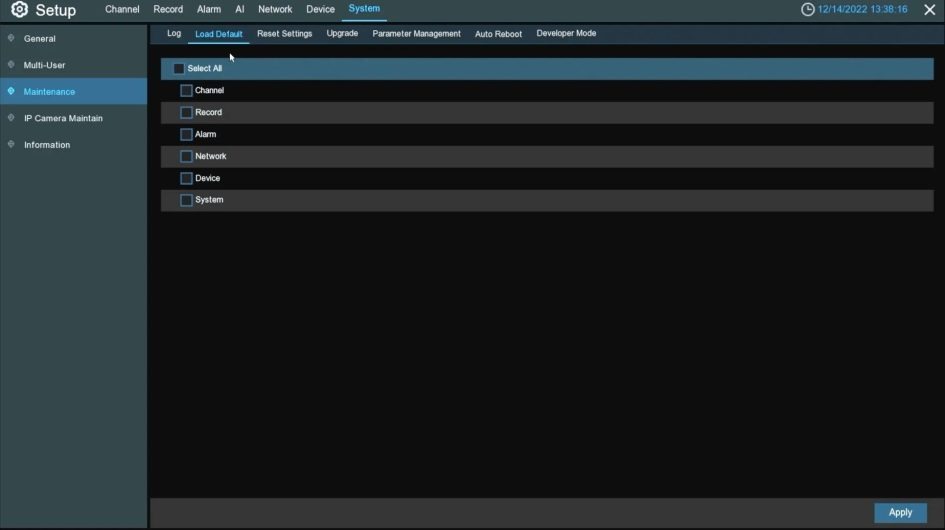
Navigate to Setup >> System >> Maintenance >> Load Default >> check the Network box and Apply
Camius Trivault DVR (local interface via HDMI)
Web browser view
6 – Check the Camius device network status
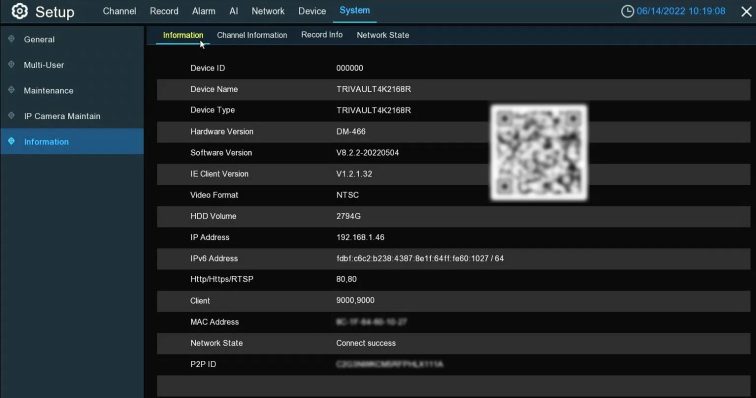
Navigate to Setup >> System >> Information and check the Network Status if it shows ‘Connect success‘.
If the above steps don’t help, submit a support request and include the device model number and the current ‘Firmware/Software Version,’ which can be found using the Camius Device Config Tool
HDMI interface: DVR / NVR information is available under Setup >> System >> Information
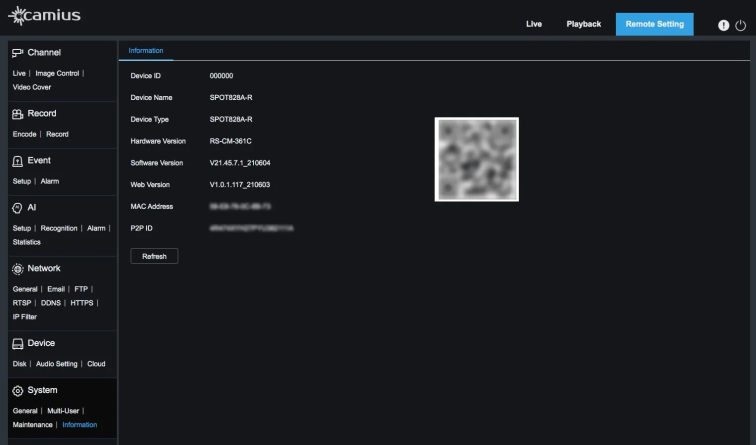
Web browser view: information is available under Remote Setting >> System >> Information (web browser view)
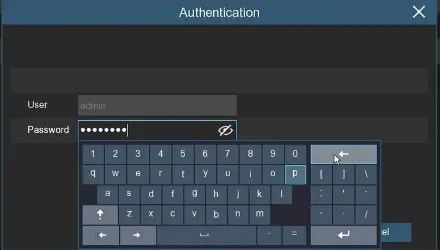
7 – Wrong Password
Before you add the Camius security device to the app, make sure to set a password following the below setup guides:
We got you if you lost your IP camera or DVR NVR recorders password. Follow the below links on how to reset your device password:
You can not set a password on your Camius device using the Camius View app.
Easy Steps for Password Reset – unlock your NVR, DVR
We got you if you forgot your Camius DVR or NVR recorder’s password. There are two ways to reset your Camius NVR or DVR password, which are described below.
OPTION 1 – applicable to Camius security NVR, DVR with a reset button
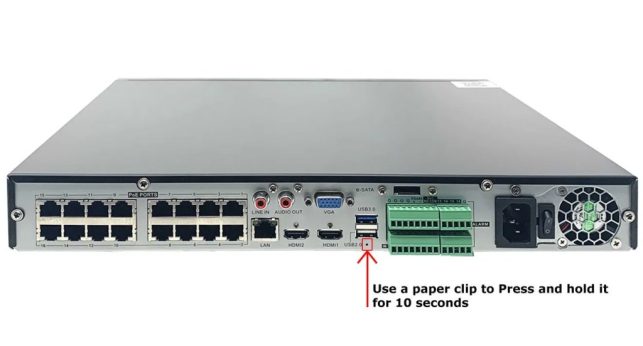
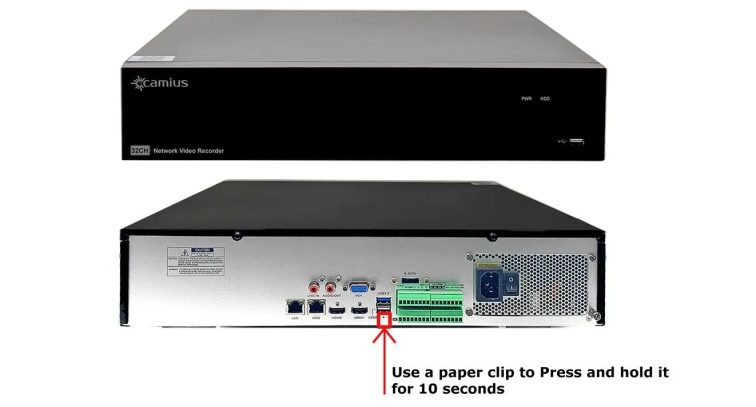
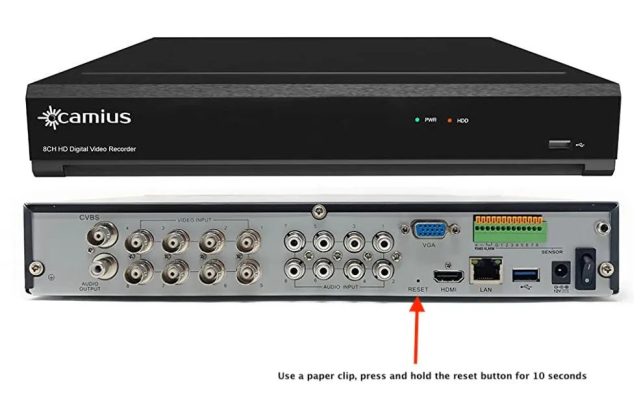
If your recorder has a reset button, press and hold it for 10 seconds; you will hear an audible confirmation. This will reset all settings, including the password, but not erase recorded footage on your hard drive.
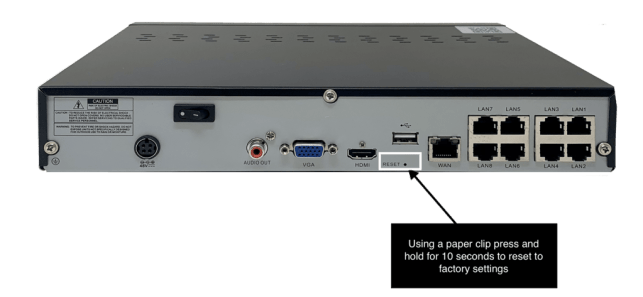
Picture 1 – Reset button of Camius 8 channel NVR [IPVAULT1128PR}
Picture 2 – Reset button of Camius 16 channel NVR [IPVAULT2256PR]
Picture 3 – Reset button of 32 channel NVR [IPVAULT8256R]
Picture 5 – Reset button of Camius 8 channel DVR [TRIVAULT4K184R, TRIVAULT4K184R2}
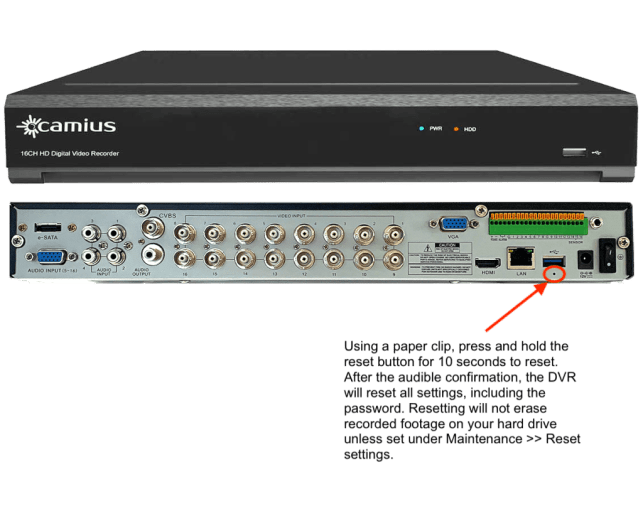
Picture 6 – Reset button of Camius 16 channel DVR TRIVAULT2168R, TRIVAULT4K2168R
OPTION 2 – applicable to Camius DVR or NVR recorders without a reset button
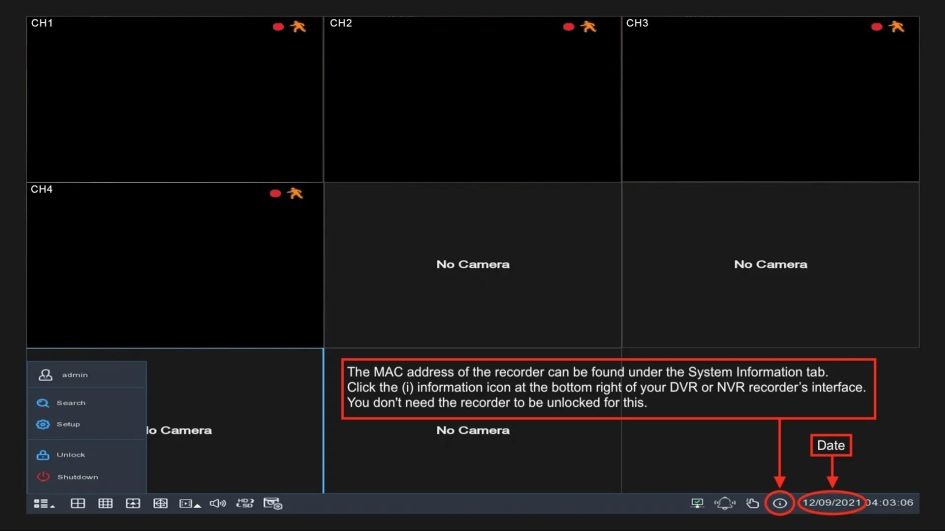
If your DVR digital video recorder or NVR network video recorder doesn’t have a reset button, please follow the below steps to receive a temporary password that is Mac ID and Date sensitive.
This applies to IPVAULT160P, IPVAULT1128P, IPVAULT2320P8N, IPVAULT2320P16N, IPVAULT82320-N, TRIVAULT184, TRIVAULT4K184, TRIVAULT4K2168
STEP 1 – Have your recorder connected to a monitor via HDMI or VGA output.
STEP 2 – Once you have your device Mac ID and current date
Once you have your device Mac ID and current date, submit a support request here, select the subject as ‘Lost Password,’ and include the model number, Mac ID (xx-xx-xx-xx-xx-xx), and Date (MM/DD/YYYY) on your device. Make sure to use the correct email address.
IMPORTANT: Ensure to include the NVR/DVR recorder’s model number available on the recorder’s enclosure and box label or purchase details (order number and/or shipping address)
If you didn’t register your Camius device, we recommend you do it (click here); that will speed up the support request.
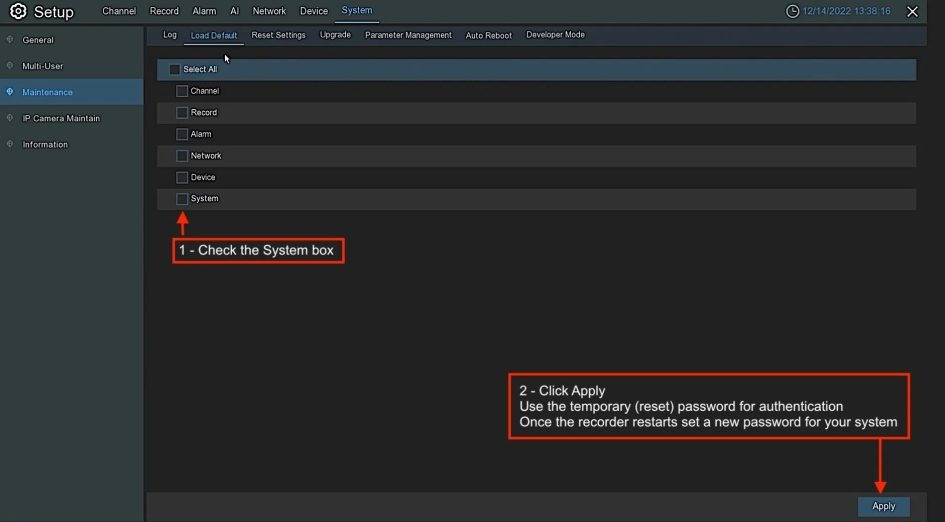
STEP 3 – Use the temporary reset password to Load the Default System settings, allowing you to set a new password for your Camius DVR or NVR.
IMPORTANT: Selecting all checkboxes in the Load Default menu will reset all your recorder settings.
Setting a New Password for your DVR or NVR
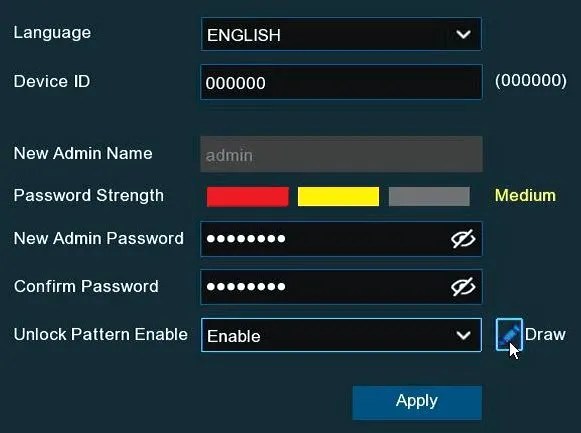
After your Camius DVR/NVR recorder restarts, you’ll need to set a new password.
Password requirements: 8–16 characters, a lowercase, an uppercase, a digit, and a special character.
The unlock pattern is optional for easy access.
Click on the tab ‘to Draw‘ and set your unlock
pattern, then click ‘Apply‘.
In addition, users can select or skip Password Recovery Questions & Answers.
